
AutoCAD Action Macros Workflow: A 2026 Power User Guide


AutoCAD Action Recorder is the built-in tool that lets architects and CAD professionals automate repetitive drafting tasks without writing a single line of code. The AutoCAD action macros workflow records your exact command sequences, saves them as replayable macros, and executes them on demand across any drawing. For professionals who spend hours on drawing cleanup, layer management, and plot preparation, this tool is not optional. It is the fastest path to consistent, repeatable output.
What is the AutoCAD action macros workflow?
The AutoCAD action macros workflow is a process of recording, saving, and replaying command sequences using the Action Recorder panel. The industry term for the recorded output is an action macro, stored as an .ACTM file on your system. The Action Recorder is designed specifically for non-programmers, covering tasks like drawing cleanup, layer control, and batch plotting without any coding knowledge required. That distinction matters. Many architects assume automation belongs to programmers. It does not.
The three core commands that drive this workflow are ACTRECORD (start recording), ACTSTOP (stop recording), and ACTPLAY (run the macro). Every other feature in the workflow builds on these three. Understanding them first gives you a mental model that makes every advanced technique easier to learn.

What tools and setup do you need before recording?
Reliable macro creation starts with a standardized drawing environment. A macro recorded in a drawing with custom layers, text styles, and linetypes will fail in a drawing that lacks those resources. Standardizing your template by pre-loading all required layers, styles, and linetypes prevents playback errors before they happen. Use a .DWT template file as your baseline for every project.
The Action Recorder panel lives on the Manage tab in the AutoCAD ribbon. Before you record anything, confirm the following:
AutoCAD 2020 or later is installed (Action Recorder is available in full AutoCAD, not AutoCAD LT)
Your .DWT template contains all layers, text styles, dimension styles, and linetypes the macro will reference
Object Snap (OSNAP) settings are configured and saved in the template
The drawing units and scale match your firm’s standard
The Action Recorder panel is visible on the Manage tab
One detail professionals often overlook: the macro file path. AutoCAD saves .ACTM files to a default folder. Set that folder to a shared network location from day one so your team can access every macro without manual file transfers.
Pro Tip: Before recording any macro, run your intended command sequence manually from start to finish at least once. This reveals unexpected prompts or dialog boxes that will interrupt playback.
How do you record and build an action macro step by step?
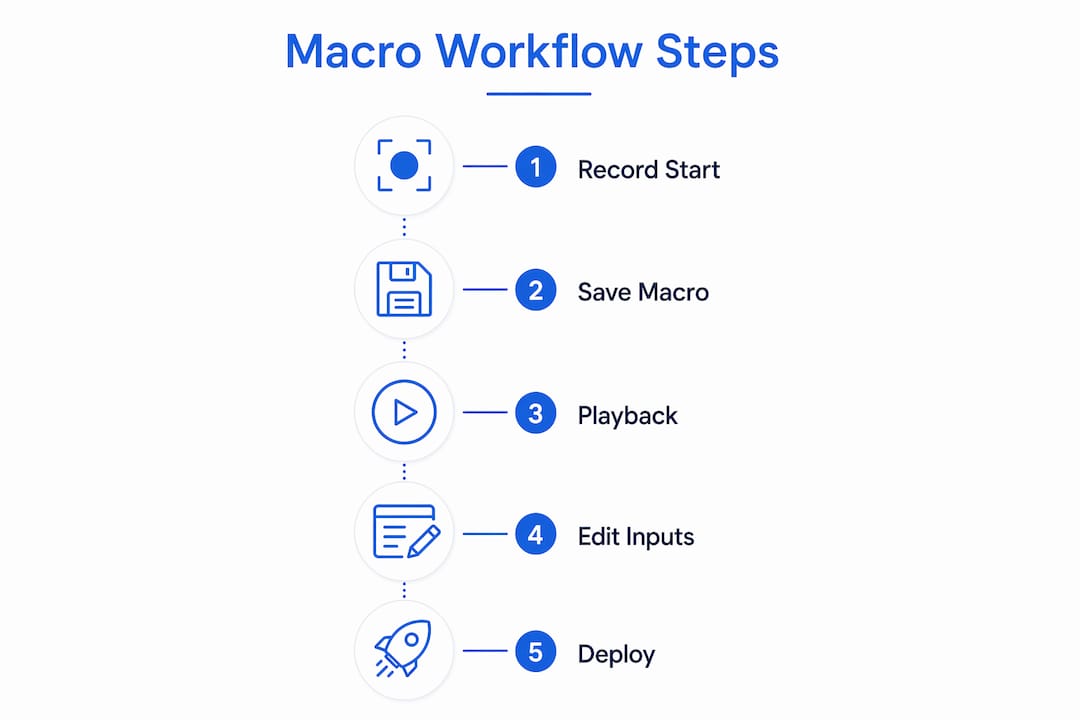
A basic macro workflow follows six clear steps. Each step has a specific purpose, and skipping any one of them produces unreliable results.
Plan the task. Write down every command, input value, and selection you will make. Macros with vague plans produce vague results. Define the exact sequence before touching the keyboard.
Start recording. Click the red Record button on the Action Recorder panel, or type ACTRECORD at the command line. AutoCAD begins capturing every command and input from this moment forward.
Perform the task with precision. Type all distances, coordinates, and values at the command line rather than clicking on screen. Typed input and object snaps produce consistent results across drawings. Screen picks capture coordinates relative to the current viewport, which changes between drawings and breaks playback.
Stop recording. Click the Stop button on the Action Recorder panel or type ACTSTOP. AutoCAD saves the sequence and prompts you to name the macro.
Name and describe the macro clearly. Use a naming convention your team will recognize, such as “LAYER-FREEZE-VIEWPORT” or “PLOT-A1-PDF.” Add a description that explains what the macro does and when to use it. This documentation pays off when your library grows to 30 or 40 macros.
Test on a clean drawing. Open a fresh drawing based on your standard template and run ACTPLAY. Watch every step execute. If the macro fails, the clean drawing environment isolates the problem immediately.
Pro Tip: Start every macro string with ^C^C (ESC ESC) to cancel any active command before execution. This prevents command conflicts and makes playback reliable regardless of what the operator was doing before running the macro.
How do you edit and customize macros for greater flexibility?
Recorded macros with fixed values work well for identical tasks. They break down the moment a task requires variable input, such as a different layer name or a custom text height. The Action Macro Manager and Action Tree solve this problem.
The Action Tree displays every recorded step as an editable node. You can reorder steps by dragging them, delete steps that are no longer needed, and insert new steps between existing ones. The most powerful edit is converting a fixed input into a “request user input” pause. Converting fixed inputs to user input steps lets the macro stop at that point during playback, accept a typed value from the operator, and continue. A macro that previously only worked for one layer name now works for any layer name.
Key customization techniques include:
Modularize by task. Build one macro per task rather than one macro for an entire workflow. A macro that freezes a layer, changes the viewport scale, and plots is three macros, not one. Smaller macros are easier to fix and easier to combine.
Document every macro. Add a description when saving. Record the date, the AutoCAD version, and the intended drawing template in the description field.
Integrate into the interface. Custom macros added to Tool Palettes or Ribbon panels are used far more often than macros buried in a folder. Visibility drives adoption.
Assign keyboard shortcuts. For macros you run dozens of times per day, a two-key shortcut beats clicking through the Ribbon every time.
A layered automation approach that combines templates, action macros, and AutoLISP scripts delivers the most sustainable productivity gains. Action macros handle the middle tier: more powerful than manual repetition, simpler to build than full scripts.
What common errors occur and how do you troubleshoot them?
Most macro failures trace back to two root causes: a non-standardized drawing environment and imprecise recording technique. Knowing the cause makes the fix obvious.
A macro is only as reliable as the environment it was recorded in. If your template is inconsistent, your macros will be inconsistent. Fix the template first, and most playback errors disappear.
Common errors and their solutions:
Missing layer or style error during playback. The macro references a resource that does not exist in the target drawing. Fix: add the missing resource to your standard .DWT template and re-record or update the macro.
Wrong geometry selected. The macro used a screen pick during recording. Fix: delete the pick step in the Action Tree and re-record that step using typed coordinates or object snaps.
Macro stops at an unexpected dialog box. Some commands open dialog boxes that the Action Recorder cannot capture. Fix: use the command-line version of the command (prefix with a hyphen, such as -LAYER instead of LAYER) to avoid dialog boxes entirely.
Playback produces different results in different drawings. The macro relies on drawing-specific settings like snap increments or UCS orientation. Fix: add SNAPUNIT, UCSICON, and UCS reset steps at the start of the macro.
Macro library becomes unmanageable. No naming convention was established early. Fix: rename all macros using a consistent schema and store them in categorized subfolders on the shared network path.
Test every macro on a scratch file before deploying it to a production drawing. This single habit eliminates the majority of costly errors. For AutoCAD fundamentals that support reliable macro creation, a solid foundation in core commands makes every recording session faster and cleaner.
Key Takeaways
The most reliable AutoCAD action macros workflow combines a standardized template, granular single-task macros, typed input during recording, and interface integration to drive consistent team adoption.
Point | Details |
Standardize the template first | Pre-load all layers, styles, and linetypes in your .DWT before recording any macro. |
Use typed input, not screen picks | Keyboard values and object snaps produce macros that work across any drawing. |
Keep macros granular | One macro per task makes troubleshooting fast and reuse straightforward. |
Add user input pauses for flexibility | Convert fixed values to “request user input” steps so macros handle variable data. |
Integrate macros into the interface | Tool Palettes and Ribbon panels increase team usage far more than shared folders alone. |
Why I think most teams underuse action macros
Most firms I work with have heard of the Action Recorder. Almost none of them use it consistently. The reason is not technical. It is organizational. Someone records a macro, saves it to their local drive, and it never reaches the rest of the team. The macro dies with the project.
The fix is not a better macro. It is a shared network folder, a naming convention, and five minutes of onboarding. When I started embedding macros directly into Tool Palettes and sharing the palette file across a firm, usage went from one person to the entire team within a week. The macros did not change. The discoverability did.
The other mistake I see constantly is recording macros that do too much. A macro that freezes layers, changes the viewport scale, adjusts the title block text, and sends a plot is impressive until one step fails. Then the whole sequence stops and the operator has no idea where it broke. I build macros that do one thing. They are boring individually and powerful in combination.
For architects who want to go further, the path from action macros to AutoCAD mastery runs through AutoLISP and CUI customization. Action macros are the entry point. They build the habit of thinking in repeatable sequences, which is exactly the mindset you need for deeper automation.
— Steve
Level up your AutoCAD skills with S15studio
Mastering the Action Recorder is one piece of a much larger picture. S15studio’s training programs are built by Autodesk Certified Trainer Steve Fagan specifically for architects, architectural technicians, and CAD professionals who want real-world skills, not just software familiarity.

The Complete AutoCAD training program at S15studio covers workflow customization, macro creation, and full AutoCAD certification preparation in a structured, project-based format. Every lesson connects directly to tasks you perform on actual projects. If you work in architecture and want to build a faster, more consistent drafting process, this is where that process gets built.
FAQ
What is an AutoCAD action macro?
An AutoCAD action macro is a recorded sequence of commands and inputs saved as an .ACTM file. It plays back automatically using the ACTPLAY command, repeating the exact steps recorded without manual input.
Do I need programming skills to create action macros?
No programming skills are required. The Action Recorder captures your commands as you work, so any AutoCAD user can create and run macros without coding knowledge.
Why does my macro fail in a different drawing?
Macro failures in different drawings almost always result from missing layers, styles, or linetypes that were present during recording but absent in the target drawing. Standardizing your .DWT template resolves this.
How do I make a macro work with different values each time?
Open the macro in the Action Macro Manager and convert fixed input steps to “request user input” pauses. The macro will stop at those points during playback and accept typed values from the operator.
Where should I store action macro files for a team?
Store .ACTM files on a shared network folder and set that path in AutoCAD’s Options dialog under the Files tab. Add the macros to a shared Tool Palette so every team member can access them directly from the interface.
Recommended
Comments