
AutoCAD Geometric Constraints Guide for CAD Professionals


Geometric constraints lock the shape and relationships between 2D objects in AutoCAD so your geometry holds its intended form no matter how much editing follows. The fastest way to see this: open the Parametric tab, draw a rough rectangle, and run Auto Constrain. Watch the corners snap perpendicular and the opposite sides go parallel automatically.
Autodesk’s own documentation on parametric drawing covers the underlying rules in detail.
S15studio’s project-based courses go further, showing how professionals build these habits into daily drafting work.
Pro Tip: Try Auto Constrain on a single closed shape before you use it on a full drawing. Seeing exactly which rules it applies to four lines teaches you more than reading a command list ever will.
Key Takeaways
Geometric constraints work because they encode design relationships directly into 2D geometry, so drawings hold their shape through repeated edits instead of drifting.
Point | Details |
Apply constraints in order | Lock geometric relationships first, then add dimensional values to set exact sizes. |
Use Auto Constrain, then audit | Run Auto Constrain for speed, but manually remove any redundant or unwanted constraints it adds. |
Watch for over-constraining | Limit Fix constraints to essential anchor points to avoid freezing a sketch. |
Know the cleanup commands | Use DELCONSTRAINT and the Constraint Bar to verify, relax, or remove constraints during edits. |
Build the skill with S15studio | S15studio’s project-based AutoCAD training teaches constraint workflows through real drawing exercises with trainer support. |
Table of Contents
What Is an AutoCAD Geometric Constraint and Why It Matters
A geometric constraint is a rule attached to your geometry that enforces a relationship, not just a shape. Draw two lines meant to meet at a right angle, and without a constraint, a routine edit can quietly knock them out of square. That’s the problem constraints solve: they encode design intent directly into the drawing, so the geometry defends itself against accidental drift.
This matters most in drawings that get revised repeatedly, which, in architecture and technical design, is basically all of them.
The tools live in one place: the Parametric tab on the ribbon, inside the Geometric panel. From there you can apply constraints manually, run Auto Constrain, toggle the Constraint Bar (CONSTRAINTBAR) to show or hide icons, and open the Parameters Manager to track named values.
Geometric panel: manual and automatic geometric constraint tools
Constraint Bar: visual icons showing which rules apply to each object
Parameters Manager: central list of named dimensional values
Autodesk’s guidance is consistent on sequence: apply geometric constraints before dimensional ones. Lock the relationships first. Set the numbers second.
Which Geometric Constraint Types Does AutoCAD Support?
AutoCAD ships with twelve geometric constraint types, all accessible from the Parametric tab. Keep this list near your desk while you’re learning to read the icons on-screen.
Coincident: forces two points to occupy the same location, useful for pinning a corner to an exact spot.
Collinear: keeps two or more line segments on the same infinite line, common in wall or beam alignment.
Concentric: keeps circles or arcs sharing the same center point, ideal for bolt patterns or nested rings.
Fix: anchors a point or object to a fixed location in the drawing, locking it against any downstream edit.
Parallel: keeps two lines running in the same direction without ever touching.
Perpendicular: enforces a right-angle connection, such as a wall meeting a partition.
Horizontal: locks a line parallel to the X-axis.
Vertical: locks a line parallel to the Y-axis.
Tangent: keeps a curve and a line, or two curves, touching at exactly one point.
Smooth: maintains curvature continuity between a spline and another curve, common in cabinetry or freeform panels.
Symmetric: mirrors two objects around a selected line, handy for symmetrical fixtures or brackets.
Equal: forces two lines or arcs to share the same length or radius.
Constraints aren’t limited to whole objects. You can apply them to individual segments within a polyline without exploding it, which keeps complex paths intact while still giving you segment-level control.
How Do You Apply Geometric Constraints in AutoCAD?
Most drafters start fast, then refine by hand. Here’s the sequence that works:
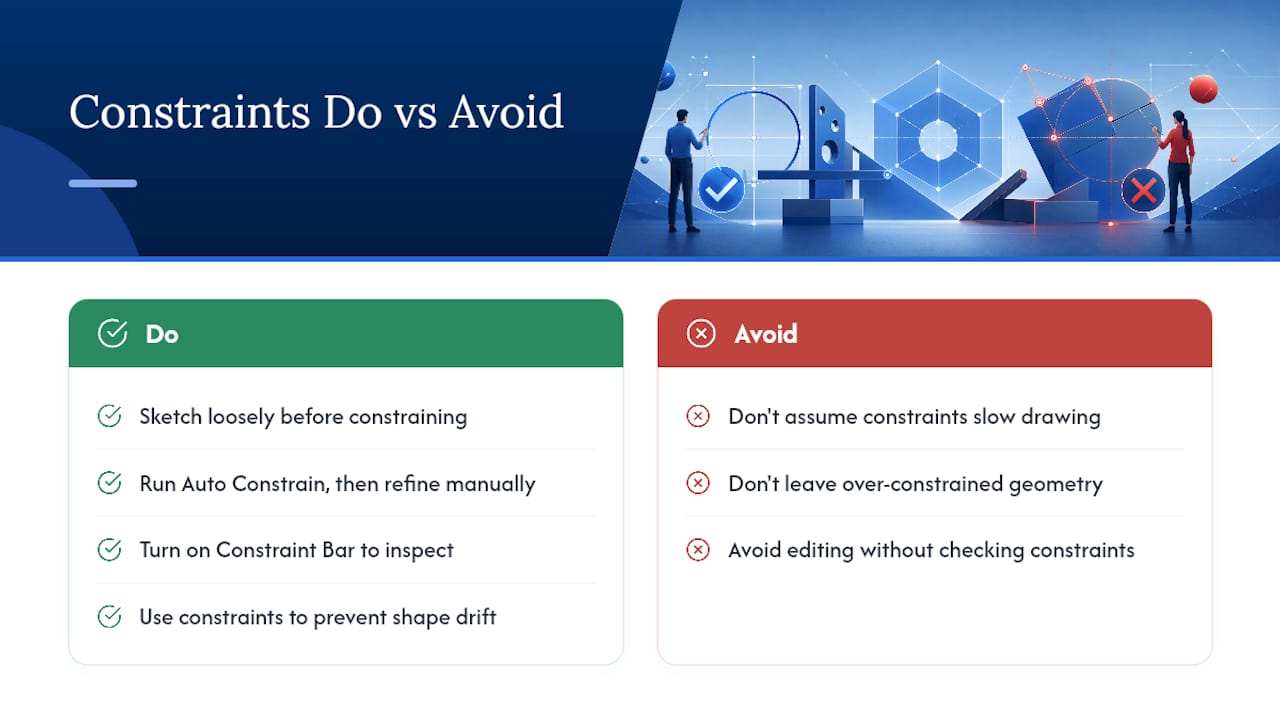
Sketch the geometry loosely, without worrying about exact angles or alignment yet.
Switch to the Parametric tab and select the objects you want to constrain.
Run Auto Constrain for a first pass. Autodesk’s own Auto Constrain tutorial walks through which constraint types get applied and how to adjust the settings that control them.
Review the result, then manually add or remove individual constraints from the Geometric panel using tools like Perpendicular and Coincident, as shown in the step-by-step Parametric tab tutorial.
Finish with a manual audit, since Auto Constrain often over-applies rules that need trimming.
Infer Constraints works differently. Turn it on and AutoCAD adds geometric constraints in real time as you draw, based on how you move your cursor relative to existing geometry. It’s useful for quick sketches where you want relationships captured on the fly, but it can also add rules you didn’t intend, especially near dense geometry. Toggle it off from the status bar when you’re working close to other objects.
Three commands to memorize: AUTOCONSTRAIN for the automatic first pass, DELCONSTRAINT for cleanup, and CONSTRAINTBAR to show or hide the little icons that clutter the screen.
Pro Tip: Reserve the Fix constraint for the one point or object that genuinely should never move, like an anchor corner tied to a site boundary. Fixing too many points early is the single fastest way to lock yourself out of an edit later.

Geometric vs. Dimensional Constraints: What’s the Difference?
Geometric constraints control relationships and shape. Dimensional constraints control numbers, things like length, angle, and radius. Autodesk’s documentation is direct on this: dimensional constraints are associative, meaning that changing a dimensional value automatically updates the geometry tied to it.
The practical order is: apply geometric constraints to lock the shape, then layer dimensional constraints on top to set exact sizes and give them names in the Parameters Manager. Skip the geometric step and your dimensional constraints have nothing stable to drive.
Geometric constraints: relationships (parallel, perpendicular, concentric)
Dimensional constraints: values (length = 200mm, angle = 90°)
How Do You Display, Verify, and Delete Constraints?
Constraint icons appear directly on your geometry once you enable the Constraint Bar (CONSTRAINTBAR). Use Show All to reveal every applied rule at once, or Hide All when the icons start crowding a dense drawing.
To remove constraints, use DELCONSTRAINT to strip selected objects or the entire drawing, or the Remove Constraints tool for more targeted cleanup.
Toggle icon visibility per object or globally through the Constraint Bar settings.
Check degrees of freedom visually. Fully constrained geometry typically shows no remaining freedom arrows.
Hold Shift while dragging a grip to temporarily relax a constraint during an edit without deleting it.
If two constraints conflict, AutoCAD flags the newer one and refuses to apply it. That’s your cue to review, not force it through.
What Are the Best Practices for Using Constraints?
The habits that separate a clean parametric sketch from a frustrating one are simple, but easy to skip under deadline pressure.
Constrain relationships before sizes. Geometric first, dimensional second, every time.
Apply constraints incrementally rather than all at once. Building them up gradually makes it easier to spot where a conflict originates.
Avoid Fix constraints unless a point genuinely needs to stay put. Over-fixing is the most common cause of a sketch that refuses to update.
Name key parameters in the Parameters Manager instead of leaving them as generic values like d1 or d2.
Auto Constrain is convenient, but it doesn’t know your design intent, only your geometry. It commonly adds more rules than you need, so audit the result and remove redundant constraints before moving on. If a sketch suddenly won’t accept an edit, turn on constraint icons and look for the specific rule blocking you rather than deleting constraints at random. For editing scenarios covered in more depth, see common AutoCAD drafting mistakes and how to fix them.
Pro Tip: When a sketch feels frozen, hold Shift and drag a grip before you touch DELCONSTRAINT. Relaxing a constraint temporarily often shows you exactly which rule is fighting your edit.
How Do Professionals Build Constraints Into Their Workflow?
A trainer-level workflow looks like this: sketch loosely first, apply geometric constraints to capture relationships, then move into the Parameters Manager to name dimensional values that actually mean something to the next person opening the file.
Put constraint icons and labels on a dedicated layer, or just toggle the Constraint Bar off for presentation views.
Build constrained templates for recurring part families. A bracket, a stair detail, a window type. Reusing a parametric block saves real hours across a project instead of redrawing the same geometry with fresh constraints each time.
A note on moving from drafting to parametric thinking
Learning constraints has a real learning curve, but the payoff compounds fast: once a sketch is properly constrained, edits that used to mean redrawing half a detail become a single dragged grip. That shift, from static lines to a sketch that behaves predictably, is what separates drafting from parametric design.
Learn Constraints Properly With S15studio’s AutoCAD Training
Reading a command list gets you started. Working through real project files, with someone checking your constraint logic, is what actually makes it stick. S15studio’s project-based AutoCAD training walks you through parametric sketching the way it’s used on live jobs, not just in isolated practice exercises.

The course pairs step-by-step video lessons with downloadable templates already built around geometric and dimensional constraints, so you can see a fully constrained sketch before you attempt one from scratch. You get direct trainer support when a constraint conflict has you stuck, plus lifetime access to the material as Autodesk updates the software around you. If you’re preparing for an Autodesk Certified User exam or just want your 2D drawings to hold up under revision, Mastering AutoCAD: The Ultimate Guide from Beginner covers this workflow in full, from your first sketch to a finished parametric template. Enroll and work through the constraint modules at your own pace.
Frequently Asked Questions
What is an AutoCAD geometric constraint, in plain terms? It’s a rule attached to two or more objects that enforces a relationship, like keeping two lines parallel or two circles concentric, so editing one part of a drawing doesn’t silently break another.
Do geometric constraints slow down drawing? Not meaningfully once you know the workflow. Sketch loosely, run Auto Constrain, then refine manually. Most drafters find it faster overall because they stop fixing shape drift after every revision.
Can I remove all constraints from a drawing at once? Yes. Run DELCONSTRAINT and select the objects, or the entire drawing, to strip every applied constraint in one step.
Why does AutoCAD refuse my edit after I add a constraint? The geometry is likely over-constrained or has conflicting rules. Turn on the Constraint Bar to see which constraints are active, then remove or relax the one causing the conflict.
Should beginners bother learning geometric constraints? Yes. They’re not an advanced-only feature. Everyday 2D drafting benefits just as much, since constraints prevent the kind of shape drift that happens during routine revisions on any drawing.
Sources
Recommended
Comments