
Revit IFC Export Explained: Clean IFCs for Architects


Getting a usable IFC out of Autodesk Revit comes down to four controls: the schema you choose, how Revit categories map to IFC entities, which property sets you include, and how linked files and shared coordinates are handled. Get those four right, and the file your structural or MEP engineer opens will actually match what you modeled. Get them wrong, and you’re fielding coordination calls about missing geometry, misclassified elements, and walls that landed 50 feet from where they should be.
The core workflow is File > Export > IFC, then Modify Setup to confirm schema, category/type mapping, property sets, and linked-file behavior before you click Export. The checklist below unpacks every one of those steps.
Choose the correct IFC schema (IFC2x3 or IFC4) before anything else
Verify category mapping or set IfcExportAs on elements that need element-level control
Use user-defined property sets instead of blanket Revit property sets for production deliverables
Set linked-file behavior and confirm shared coordinates are active
Run a quick viewer check on GUIDs, spatial tree, and a sample of mapped elements
Table of Contents
How to export IFC from Revit: the quick workflow
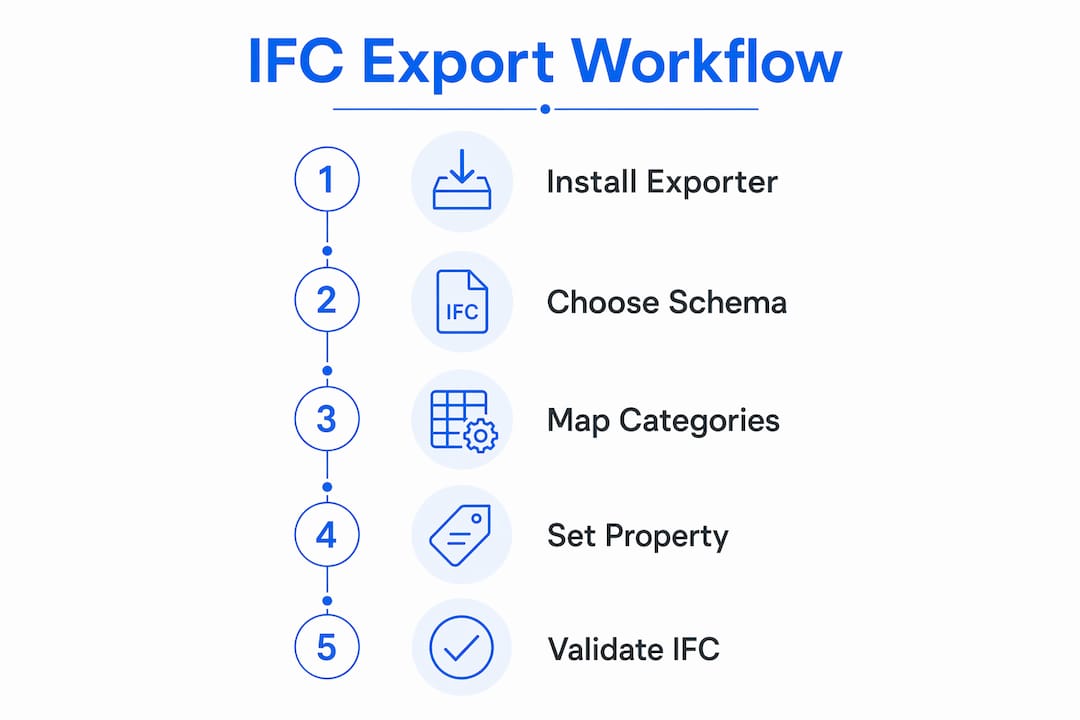
Follow these steps in order. They assume you already have a clean, phased Revit model with shared coordinates set.
Prepare the model. Confirm the active phase, clean up annotation categories you don’t want in the IFC, and verify that shared coordinates are set between any linked files.
Open the export dialog. Go to File > Export > IFC.
Duplicate a named setup. In the IFC Export dialog, select an existing setup and click Duplicate. Name it something project-specific (“ProjectX_IFC2x3_Arch_v1”). Never edit the default “In-Session” setup — it resets and can’t be reused reliably.
Click Modify Setup. Work through each tab: General (schema, phase), Additional Content (rooms, spaces, visible elements), Property Sets, and Advanced.
Set the schema. Pick IFC2x3 Coordination View 2.0 for broad compatibility, or IFC4 Reference/Design Transfer if the project requires it. More on this in the schema section below.
Confirm category mapping. Check that your mapping file is attached. If you’ve created a project-specific mapping TXT, browse to it here.
Set property sets. Enable IFC common property sets. Attach your user-defined TXT file if you have one. Leave “Export Revit property sets” off for production exports.
Set linked-file behavior. Choose whether linked models export as separate IFCs, within the same IfcProject, or not at all.
Choose export scope. “Export only elements visible in view” is useful for discipline-specific exports; full-model export is safer for coordination.
Run the export. Click Export, choose a destination folder, and confirm the file name.
Quick QA. Open the exported IFC in a neutral viewer. Spot-check the spatial tree (IfcProject > IfcSite > IfcBuilding > IfcBuildingStorey), verify a wall and a door are classified correctly, and confirm a handful of GUIDs match what Revit stored.
Pro Tip: Install the latest IFC Exporter from the Autodesk App Store rather than relying solely on the built-in Revit exporter. The standalone plugin receives bug fixes and schema improvements more frequently than the version bundled with Revit.
What each option in the Modify Setup dialog actually does
The Modify Setup dialog is where most IFC exports go wrong. Here’s what each major area controls and how to set it for a production deliverable.
General tab
IFC version / schema: Selects the export schema and MVD. This is the single most consequential setting.
File type: IFC (text) or IFCZIP (compressed). Use IFCZIP for large models or file-transfer constraints.
Phase to export: Maps to a specific Revit construction phase. Mismatching this is a common source of phantom elements.
Additional Content tab
Export only elements visible in view: Limits export to what’s visible in the active 3D view. Useful for discipline cuts; risky if your view has filters hiding structural elements you need.
Export rooms in 3D: Exports IfcSpace entities from Revit rooms. Turn this on when the recipient needs space data for FM or energy analysis.
Export linked files: Controls how linked Revit models are handled (covered in detail in the linked-models section).
Property Sets tab
Export IFC common property sets: Exports the standard Pset_ families defined by buildingSMART. Leave this on for most deliverables.
Export Revit property sets: Dumps all Revit parameter groups into the IFC. Autodesk cautions this includes obsolete internal data and significantly inflates file size. Use it for testing only, not production.
Export user defined property sets: Points to your custom TXT mapping file. This is the right approach for curated, recipient-specific data.
Export base quantities: Adds geometric quantities (area, volume, length) to elements. Requires the latest IFC exporter for consistent results.
Advanced tab
Store IFC GUIDs in Revit project: Writes the IFC GlobalId back to each Revit element as a shared parameter. Do this on any project where IFC files will be updated over time — it keeps GUIDs stable across re-exports.
Level splitting: Splits geometry by building story. Affects IfcLocalPlacement; turning it off can simplify geometry but breaks the spatial hierarchy for some downstream tools.
Geometry representation: Controls tessellation detail and whether elements export as BRep or extrusion. Higher tessellation produces more accurate curves but larger files.
Pro Tip: For complex geometry like curved walls or parametric families, test a small 3D view export first. If geometry looks faceted or broken in the viewer, increase tessellation LOD in the Advanced tab before running the full model.
Which IFC schema should you choose?
The short answer: follow the project contract or client requirement first. If the spec says IFC2x3 Coordination View 2.0, that’s your answer regardless of what you’d prefer. When the contract is silent, here’s how to decide.
IFC2x3 Coordination View 2.0 is the safe default. Nearly every BIM tool in active use supports it, and Autodesk’s certified export variants include it as a primary option. The trade-off is that IFC2x3 has a more limited geometry kernel — complex parametric geometry sometimes degrades to faceted BRep, and newer entity types aren’t available.
IFC4 Reference View / Design Transfer View offers a richer geometry kernel (advanced BRep, tessellation), newer entity types, and better alignment with current buildingSMART standards. The catch is that not all downstream tools handle IFC4 cleanly yet, particularly older structural analysis or FM platforms.
IFC4.3 is the current buildingSMART standard for infrastructure projects. Revit’s native support for IFC4.3 is still maturing; check the current IFC Exporter release notes before committing to it on a live project.
Dimension | IFC2x3 Coord. View 2.0 | IFC4 Reference / Design Transfer |
Downstream tool compatibility | Very broad | Good, improving |
Geometry fidelity | BRep / extrusion | Advanced BRep, tessellation |
Newer entity types | Limited | Yes |
COBie / FM workflows | Via COBie variant | Better native support |
Government / MVD mandates | Often required | Increasingly required |
File size (typical) | Moderate | Slightly larger |
If the recipient uses COBie for FM handover, select the COBie export variant — it’s a certified export option in Revit’s dialog.
If a government BIM mandate specifies a particular MVD, match it exactly.
When in doubt and the contract is silent, IFC2x3 Coordination View 2.0 is the lowest-risk choice.
How Revit categories map to IFC entities, and how to fix misclassifications
Every Revit element exports to an IFC class based on a mapping table. By default, Revit uses a built-in mapping file stored at C:\ProgramData\Autodesk\RVT [version]\exportlayers-ifc-IAI.txt. Editing that file directly is a bad idea — it affects every project on that machine. Create a project-specific copy instead.

Accurate IFC exports start with correct category mapping. A wall that exports as IfcProxy instead of IfcWall is invisible to structural clash detection. A site element that lands outside IfcSite breaks the entire spatial hierarchy. These aren’t cosmetic problems — they make the IFC unusable for coordination.
Mapping checklist
Open File > Export > Options > IFC Options to review the current mapping table.
Duplicate the default mapping file and save it to your project folder with a version number.
Audit each category you’re exporting. Confirm the IFC Class and IFC Type columns are correct.
Set categories you don’t want in the IFC (annotation, detail items, reference planes) to “Not Exported.”
Map finish layers (Revit “Finishes” subcategory) to IfcCovering rather than leaving them as IfcWall.
Check site elements: Revit’s Topography category should map to IfcSite or IfcGeographicElement, not a generic proxy.
For MEP, verify that each physical system type maps to the correct IFC entity (IfcPipeSegment, IfcDuctSegment, etc.) rather than a generic IfcFlowSegment.
Using IfcExportAs for element-level control
When the global mapping file isn’t granular enough, add the IfcExportAs shared parameter to individual families or elements. This overrides the category-level mapping for that specific element. It’s the right tool when you have a custom family that doesn’t fit neatly into any standard Revit category — a hybrid structural/architectural element, for example, or a specialty equipment item that needs to export as IfcFurnishingElement rather than IfcBuildingElementProxy.
To use it: add the IfcExportAs shared parameter to the family or project, then set the value to the target IFC class name (e.g., IfcCovering). The exporter reads this value and overrides the mapping table for that element.
Property sets: what to export and how to build a user-defined TXT mapping
Three property-set options sit in the Modify Setup dialog, and choosing the wrong one is the fastest way to either lose data or bloat your IFC to an unworkable size.
The three options
IFC common property sets: Standard Pset_ families from buildingSMART (Pset_WallCommon, Pset_DoorCommon, etc.). Include these for any coordination or compliance deliverable.
Export Revit property sets: Exports all Revit parameter groups as custom property sets. Autodesk’s own documentation flags this as a testing tool, not a production setting — it pulls in obsolete internal parameters and can significantly inflate file size.
User-defined property sets (TXT file): A curated mapping you control. This is the right approach for production.
Building a user-defined property set TXT file
Revit reads a plain-text file that follows a specific structure. Here’s a minimal example:
PropertySet: Pset_WallCustom 1 IfcWall
 FireRating IfcLabel FireRating
 ThermalTransmittance IfcThermalTransmittanceMeasure ThermalTransmittance
The first line declares the property set name, the IFC version it targets, and the IFC class it applies to. Each subsequent line maps a Revit parameter name to an IFC property type and IFC property name.
To attach it: in Modify Setup > Property Sets, check “Export user defined property sets” and browse to your TXT file. Run a test export on a small view, then open the IFC in a viewer and confirm the properties appear on the correct elements.
Pro Tip: Keep your user-defined TXT file in the same version-controlled folder as your project-specific mapping file. Every IFC deliverable should be traceable to the exact TXT and mapping files used to produce it — this matters when a recipient reports missing properties six months later.
Handling linked models, shared coordinates, and spatial structure
Linked Revit files add a layer of complexity that catches teams off guard. The Export Setup gives you four options for linked models:
Do not export: The linked model is ignored entirely. Use this when the linked file belongs to another discipline that will produce its own IFC.
Export as separate IFCs: Each linked model exports to its own IFC file. The right choice for federated, multi-discipline workflows where each team owns their file.
Export in same IfcProject: Linked geometry merges into the host IFC under the same IfcProject. Works for small, co-located projects where all disciplines are managed by one team.
Export in same IfcSite: Similar to the above but at the site level. Useful when multiple buildings share a site.
Spatial structure checklist
Confirm shared coordinates are active between the host and all linked files before exporting.
Check that each level you intend to export has “Building Story” set to Yes in the Level properties. Levels without this flag won’t generate IfcBuildingStorey entities.
Verify level names and elevations match across disciplines — a level named “Level 1” in the architectural model and “FL 01” in the structural model creates two separate IfcBuildingStorey entities in a federated viewer.
Confirm the IfcSite > IfcBuilding > IfcBuildingStorey hierarchy is intact after export.
Decision flow
Small project, one team managing all disciplines? Export as one IfcProject. Multi-discipline federated model where structural, MEP, and architectural teams maintain separate Revit files? Export separate IFCs and coordinate aggregation in a federated viewer like Navisworks or a buildingSMART-compliant platform.

Pro Tip: After export, open the IFC alongside the host Revit model in a viewer that supports shared coordinates. If the IFC lands at the correct origin and elevation, your coordinate handling is correct. If it’s offset, go back and confirm the Revit project’s Survey Point and Project Base Point settings before re-exporting.
Common pitfalls and how to fix them
Most IFC export failures fall into a short list of repeatable mistakes. Here’s what goes wrong and the concrete fix for each.
Wrong schema: Recipient’s tool can’t open the file or loses geometry. Fix: confirm the required schema with the recipient before export; default to IFC2x3 Coordination View 2.0 when unsure.
Poor category mapping: Elements export as IfcBuildingElementProxy instead of their correct class. Fix: audit the mapping table, create a project-specific mapping file, and use IfcExportAs for elements that need element-level overrides.
Blanket Revit property set export: File size balloons; recipients complain about noise data. Fix: disable “Export Revit property sets” for production; use user-defined or common property sets instead.
View-based export missing elements: Geometry is absent because a view filter hid it. Fix: switch to full-model export, or audit the 3D view’s visibility/graphics settings before running a view-based export. Reviewing common Revit modeling mistakes before export can catch upstream issues that cause this.
Broken spatial hierarchy: IfcBuildingStorey entities are missing or misnamed. Fix: check Building Story flags on levels, verify level naming consistency, and confirm the spatial tree in a viewer immediately after export.
Coordinate offset in linked files: Linked geometry lands at the wrong location. Fix: set shared coordinates between host and linked files before export; run the placement test described in the linked-models section.
Unstable GUIDs across re-exports: Element GUIDs change on every export, breaking model-comparison workflows. Fix: enable “Store IFC GUIDs in Revit project” in the Advanced tab on the first export and keep it enabled for all subsequent exports.
Missing base quantities: Quantities are absent even though the recipient needs them. Fix: enable “Export base quantities” in the Property Sets tab and install the latest IFC Exporter from the Autodesk App Store.
Complex geometry failures: Curved or parametric families export as coarse faceted meshes. Fix: increase tessellation LOD in the Advanced tab; test on a small view before running the full model.
How to validate your exported IFC
Exporting without validating is like printing a drawing without checking it. A five-minute viewer check catches the problems that matter before the file reaches a recipient.
Validation checklist
Open the IFC in a neutral viewer (not Revit itself — Revit re-interprets its own exports in ways that mask problems).
Check the spatial tree: IfcProject > IfcSite > IfcBuilding > IfcBuildingStorey should be present and correctly named.
Spot-check five to ten element GUIDs against the values stored in Revit (if you enabled GUID storage).
Verify that a representative wall, door, and window are classified as IfcWall, IfcDoor, and IfcWindow respectively.
If base quantities were exported, check that area and volume values appear on at least one wall and one slab.
Confirm coordinate placement: the model should sit at the expected location relative to the project origin.
For user-defined property sets, confirm the custom Pset_ appears on the target element type.
Check | Expected result | Quick fix if it fails |
Spatial tree present | IfcProject > IfcSite > IfcBuilding > IfcBuildingStorey | Check Building Story flags on levels; re-export |
Element classification | Walls = IfcWall, Doors = IfcDoor | Edit mapping file or set IfcExportAs on affected elements |
GUID stability | GUIDs match Revit stored values | Enable “Store IFC GUIDs in Revit project” and re-export |
Property sets present | Pset_WallCommon or custom Pset_ on walls | Confirm TXT file path in Modify Setup; re-export |
Base quantities | Area/volume on walls and slabs | Enable “Export base quantities”; install latest IFC Exporter |
Coordinate placement | Model at correct origin and elevation | Verify shared coordinates and Survey Point settings |
For schema and MVD compliance beyond a visual check, run the file through a buildingSMART-certified validation tool. The buildingSMART technical portal maintains a list of certified software and validation resources.
The S15studio recommended export workflow
This is the workflow Steve Fagan uses as the basis for S15studio’s Revit training — a reproducible sequence that teams can adopt as a standard operating procedure.
Clean the model. Purge unused families, confirm phases, and resolve any obvious modeling errors before touching the export dialog. Upstream problems become downstream IFC problems.
Set shared coordinates. Confirm the Survey Point and Project Base Point are correctly positioned. For linked files, use Manage > Coordinates > Acquire Coordinates or Publish Coordinates as appropriate.
Duplicate and name the export setup. Use a naming convention like [Project]_[Schema]_[Discipline]_v[n] (e.g., TowerA_IFC2x3_Arch_v2). Store the setup name in your project log.
Set schema and phase. Match the contract requirement. Document the choice.
Attach the mapping file. Point to the project-specific mapping TXT in a version-controlled project folder. Never use the default system file for a deliverable.
Configure property sets. Enable IFC common property sets. Attach the user-defined TXT. Leave Revit property sets off.
Set geometry LOD. Test on a small view first if the model contains complex parametric geometry.
Set linked-file behavior. Match the project’s federated model strategy.
Export and validate. Run the viewer checklist above. Assign the spatial-tree check to the BIM lead and the element-classification spot-check to the discipline lead.
Store GUIDs. Enable “Store IFC GUIDs in Revit project” on the first export. Keep it on for all subsequent exports of the same model.
Archive the deliverable. Save the IFC alongside the mapping TXT, the export setup name, and the Revit model version in a clearly named deliverable folder.
Naming and version control: keep mapping TXT files in a \BIM\IFC_Mapping\ subfolder with version numbers (Pset_Custom_v3.txt). Every IFC deliverable should reference the exact TXT version used — this is the only way to reproduce or audit an export months later.
Steve Fagan is an Autodesk Certified Trainer and the founder of S15studio. The full printable export checklist is available with S15studio’s Revit course materials.
Pro Tip: Run a test export on a single representative 3D view before committing to a full-model export. A five-minute test catches schema mismatches, mapping errors, and coordinate problems before they cost you an hour of re-export time.
Key Takeaways
A correctly configured Revit IFC export requires the right schema, accurate category mapping, curated property sets, and verified shared coordinates — all four controls must be set before you click Export.
Point | Details |
Schema choice first | Match the contract requirement; default to IFC2x3 Coordination View 2.0 when the spec is silent. |
Mapping file matters | Create a project-specific mapping TXT; never rely on the system default for a production deliverable. |
Avoid blanket property sets | Disable “Export Revit property sets” for production; use user-defined or common property sets to control file size and data quality. |
Verify shared coordinates | Confirm Survey Point settings and linked-file coordinate alignment before every export. |
S15studio training | Steve Fagan’s project-based Revit courses cover the full IFC export workflow, including the downloadable checklist and hands-on practice. |
Why consistent IFC exports are worth the setup time
The teams that struggle most with IFC coordination aren’t the ones with bad models. They’re the ones who treat every export as a one-off event, tweaking settings each time and wondering why the structural engineer keeps reporting misclassified elements.
The real cost of an inconsistent export setup shows up in review meetings, not in the export dialog. When a federated model review surfaces fifty IfcBuildingElementProxy entities that should be IfcWall, someone has to trace them back to the source, fix the mapping, re-export, and redistribute the file. That cycle repeats until the mapping is locked down. A standardized setup with a named configuration, a version-controlled mapping file, and a five-minute validation checklist eliminates most of that rework before it starts.
The other thing teams underestimate is GUID stability. If GUIDs change on every export, model-comparison tools can’t track element changes between versions. Enabling “Store IFC GUIDs in Revit project” on the first export and keeping it on costs nothing and saves significant pain during clash detection and change management.
Property set discipline matters too. A bloated IFC full of internal Revit parameters isn’t just large — it’s harder for recipients to parse, and it signals to the receiving team that the exporting team doesn’t fully control their own data. A lean, well-mapped IFC with the right Pset_ families is a professional deliverable. It’s also faster to open, faster to validate, and faster to federate.
Take your Revit IFC skills further with S15studio
Knowing the settings is one thing. Applying them under project pressure, across disciplines, with linked files and tight deadlines, is where the real skill develops.

S15studio’s project-based Revit training covers the full IFC export workflow hands-on, including setting up named export configurations, building user-defined property set TXT files, validating exports in a neutral viewer, and troubleshooting the mapping errors that show up on real projects. The downloadable IFC export checklist is included with course materials. Steve Fagan, an Autodesk Certified Trainer, built every course around the workflows architects and BIM professionals actually use on live projects, not textbook exercises.
If you’re coordinating across disciplines and need to get your team’s export process locked down, the Revit Worksharing course is the natural next step. It covers shared coordinates, linked-file discipline, and the team workflows that make repeatable IFC exports possible. Browse the full course catalog at S15studio and pick the level that fits where you are right now.
Recommended
Comments