
AutoCAD Ribbon Interface: Your Practical Quick Guide


The AutoCAD ribbon interface is a task-based toolbar organized into tabs and panels, docked across the top of the screen by default, that replaces the old menu bar and floating toolbars with a single, context-sensitive command hub. To show it, type RIBBON in the Command line and press Enter. To hide it, type RIBBONCLOSE. If your ribbon has gone missing entirely, switching workspaces via the Workspace Switching icon on the Status Bar usually brings it back. The full About the Ribbon documentation from Autodesk covers every docking and floating option in detail.
Quick commands to try right now:
RIBBON — turns the ribbon on
RIBBONCLOSE — turns the ribbon off
Workspace Switching menu (Status Bar, bottom right) — switches or resets your workspace and ribbon state
CUI — opens the Customize User Interface dialog for deeper edits
Pro Tip: If AutoCAD opens without a ribbon, check the Status Bar for the Workspace Switching icon. Selecting “Drafting & Annotation” or “AutoCAD Classic” resets the ribbon to its default layout in seconds.
Key Takeaways
The AutoCAD ribbon is a task-based interface of tabs and panels that you can show, hide, float, and fully customize through the CUI dialog without any programming knowledge.
Point | Details |
Show or hide the ribbon fast | Type RIBBON to show it, RIBBONCLOSE to hide it, or switch workspaces from the Status Bar. |
Contextual tabs appear automatically | Selecting objects like Mtext or table cells loads task-specific tools that vanish when you’re done. |
Save your workspace to keep changes | Ribbon state lives in the .cuix file; always save the workspace after editing or changes won’t persist. |
CUI handles all deep customization | Type CUI to create custom tabs, add panels, resize buttons, and export a portable .cuix file. |
S15studio courses build on this guide | Steve Fagan’s AutoCAD mastery course covers ribbon customization, workspace management, and ACU exam prep with real project files. |
Table of Contents
How the AutoCAD ribbon interface is organized
The ribbon’s structure follows a simple hierarchy: tabs contain panels, and panels contain individual controls. Tabs group broad task categories. Panels within each tab group related commands. Each panel can expand to reveal additional tools, and some have a slide-out arrow at the bottom that exposes secondary options without cluttering the main view.
Autodesk’s getting-started resources identify the Home tab and Quick Access toolbar as the two places beginners should anchor their workflow. The Home tab holds the commands you’ll reach for constantly: Line, Circle, Arc, Trim, Extend, Move, Copy, and Layer controls. The Quick Access toolbar, sitting above the ribbon, keeps file commands (New, Open, Save, Undo) one click away regardless of which tab is active.
Tab | Key Panels | Primary Purpose |
Home | Draw, Modify, Layers, Annotation | Core 2D drafting commands |
Insert | Block, Reference, Point Cloud | Inserting blocks, xrefs, and external data |
Annotate | Text, Dimensions, Leaders, Tables | Adding notes, dimensions, and callouts |
View | Viewport Tools, Navigate, Palettes | Controlling display, UCS, and palettes |
Manage | Customization, CAD Standards, Apps | CUI, scripts, and standards management |
Output | Plot, Publish, Export | Printing and file export |
Panel controls come in three forms: large icon buttons for the most common command, smaller icon rows for related variants, and drop-down arrows that reveal a flyout of additional options. The small arrow in a panel’s bottom-right corner opens the associated dialog box — the Layers panel arrow opens Layer Properties Manager, for example.
Pro Tip: Right-click any panel title to see a list of all available panels for that tab. You can toggle panels on or off without opening CUI, which is faster for quick layout adjustments.
How contextual ribbon tabs adapt to what you select
Contextual tabs appear automatically when you select a specific object or activate a particular command, then disappear the moment you finish. They surface exactly the tools you need for that task without forcing you to hunt across permanent tabs. As Autodesk’s Heidi Hewett describes it, the ribbon acts as a dynamic workspace that surfaces relevant tools exactly when the user needs them.
Three concrete examples:
Mtext Editor. Double-click any multiline text object and the Text Editor contextual tab appears, giving you font, paragraph, column, and spell-check controls. Close the editor and the tab vanishes.
Table Cell. Click inside a table cell and the Table Cell contextual tab loads with merge, border, and formula options. It’s the only place those controls live.
Layout Tab. Click a Layout tab at the bottom of the drawing area and a Layout contextual tab appears on the ribbon with page setup, viewport, and insert tools specific to paper space. This is especially useful when managing multiple sheet layouts. For more on how layouts interact with the ribbon, the model space vs. paper space guide explains the relationship clearly.
You can control which contextual tabs appear by editing their visibility settings in the CUI dialog, though the defaults cover the vast majority of workflows without any adjustment.
Floating panels and slide-out panels: arranging your tools for faster access
Panels don’t have to stay locked in the ribbon. Drag a panel by its title bar and it detaches into a floating palette that stays visible regardless of which tab you switch to. That persistence is the key advantage: a floating Properties or Layer panel stays on screen through every tab change, so you’re not constantly clicking back to Home just to adjust a layer.

Autodesk’s ribbon documentation confirms that floating panels remain open until you explicitly return them to the ribbon, and they can be dragged onto a second monitor for persistent access to critical tools.
Slide-out panels work differently. The small arrow at the bottom of a panel expands it to show secondary tools. By default, the panel collapses again when you click elsewhere. The push-pin icon in the expanded panel locks it open, which is worth doing during multi-step workflows where you need repeated access to those secondary tools without re-expanding every time.
To create a persistent floating panel on a second monitor:
Locate the panel you want to float (for example, the Layers panel on the Home tab).
Click and drag the panel’s title bar away from the ribbon until it detaches.
Drag the floating panel to your second monitor and position it where it won’t obscure your drawing.
To return it to the ribbon, drag it back toward the ribbon area until the blue docking indicator appears, then release.
Pro Tip: Float the Properties panel on a second monitor. It updates live as you select objects, so you can read and edit object properties without ever leaving your drawing view.
Workspaces and ribbon states: minimizing, docking, and restoring the ribbon
The ribbon has three display states you can cycle through by clicking the small arrow at the ribbon’s top-right corner:
Full ribbon — all panels and icons visible (default)
Minimized to panel titles — shows tab and panel names only; hover to expand a panel temporarily
Minimized to tab names — shows only tab names; click a tab to see its panels
Hidden — ribbon is off entirely (use RIBBON to restore)
Cycling between these states is useful when you need maximum drawing area. Minimizing to tab names gives back significant vertical screen space while keeping every command one click away.
The ribbon docks at the top by default, but you can dock it vertically on the left or right side by dragging it to that edge. Vertical docking works well on ultrawide monitors. To undock it entirely, drag the ribbon’s left edge away from the screen border until it floats as a palette.
Workspace settings, including ribbon state and panel positions, are stored in the workspace .cuix file rather than in the drawing. Switch or reset a workspace using the Workspace Switching menu on the Status Bar. After making any layout changes you want to keep, select “Save Current Workspace” from that same menu — otherwise AutoCAD won’t remember your setup next session.
Customizing the ribbon with CUI and right-click shortcuts
No programming experience is required to reorganize the ribbon. Autodesk’s ribbon customization guide walks through the full CUI workflow, including creating custom tabs, adding panels, and exporting .cuix files for use on other machines.
To build a custom tab with your most-used commands:
Type CUI and press Enter to open the Customize User Interface dialog.
In the Customizations panel (left side), expand “Ribbon” then “Tabs.”
Right-click “Tabs” and select “New Tab.” Name it something specific, like “My Drafting.”
Expand “Ribbon” then “Panels.” Drag an existing panel (for example, “Draw”) into your new tab.
To add a custom panel, right-click “Panels,” select “New Panel,” name it, then drag commands from the Command List (bottom left) into the panel.
To make a button larger, right-click the command in the panel tree and change its button style to “Large Image.”
Click Apply, then OK.
To export your setup, go to the Manage tab on the ribbon and select “Export UI.” This saves a .cuix file you can import on any other AutoCAD installation. The difference between saving a workspace and exporting a .cuix: saving a workspace stores your current UI state inside the main customization file; exporting a .cuix creates a portable copy you can share or back up independently.
For quick changes without opening CUI, right-click any tab name on the ribbon to see a list of all available tabs with checkboxes. Right-click a panel title for options to move or hide that specific panel.
Troubleshooting a missing or misbehaving ribbon
Most ribbon problems have a fast fix. Work through these steps in order before trying anything drastic:
Type RIBBON and press Enter. This is the fastest fix for a missing ribbon.
Check that RIBBONCLOSE wasn’t run accidentally. If the ribbon disappears after a command session, this is often the cause.
Switch workspaces. Open the Workspace Switching menu on the Status Bar and select “Drafting & Annotation.” This reloads the default ribbon layout.
Reset the workspace to default. In the Workspace Switching menu, select “Workspace Settings” and restore the default workspace.
Restart AutoCAD. Some display glitches clear on restart without any other action.
If a custom ribbon layout keeps disappearing after restarts, the most common reason is forgetting to save the workspace after editing. Ribbon state lives in the .cuix file, not the drawing. After any CUI changes, always save the workspace via the Workspace Switching menu.
Back up your custom .cuix file before doing any wholesale reset. A reset wipes your customizations, and without a backup, that work is gone. Copy the .cuix to a safe folder first.
For palette recovery issues in related Autodesk software, the S15studio guide on restoring UI elements covers similar troubleshooting logic that applies across the Autodesk product family.
Three hands-on exercises to build ribbon fluency
These exercises take 15–30 minutes total and build on each other. Autodesk’s UI tour provides visual demos that pair well with each exercise if you prefer following along visually.
Exercise 1 — Locate commands across tabs (5–10 min). Open a new drawing. Find the Line command on the Home tab, Draw panel. Then find the Insert Block command on the Insert tab. Finally, find the Dimension Linear command on the Annotate tab. After clicking each, check the Command line to confirm the command name AutoCAD registers. This builds the habit of reading the Command line alongside the ribbon, which Autodesk’s learning materials recommend as a best practice for new users.
Exercise 2 — Use a contextual tab (5–10 min). Draw a rectangle, then use the Mtext command to place a text object inside it. Double-click the text object. Observe the Text Editor contextual tab that appears. Use the font size and bold controls in that tab to format your text. Click outside the text to close the editor and watch the contextual tab disappear. Repeat with a table: insert a table, click a cell, and explore the Table Cell contextual tab.
Exercise 3 — Build and export a custom tab (15–30 min). Type CUI. Create a new ribbon tab named after your discipline (for example, “Arch Drafting”). Add the Draw, Layers, and Annotation panels to it. Create one custom panel called “Favorites” and add your three most-used commands from the Command List. Click Apply and OK. Switch to your new tab on the ribbon to verify it works. Then go to Manage > Export UI and save the .cuix file to your desktop. This file is now portable and importable on any AutoCAD installation.
Why ribbon fluency matters more than most tutorials admit
Most AutoCAD tutorials treat the ribbon as a given — here are the tabs, here are the panels, now go draw. That approach misses the real productivity gain. The ribbon’s value isn’t in knowing where every command lives. It’s in setting it up so you almost never have to look.
When the ribbon is configured around your actual workflow, the “hunt-and-click” cycle that slows down new users essentially disappears. A drafter who has floated their Properties panel, pinned their slide-out annotation tools, and built a custom tab for their five most-used commands moves through a drawing session at a fundamentally different pace than someone using the default layout unchanged.
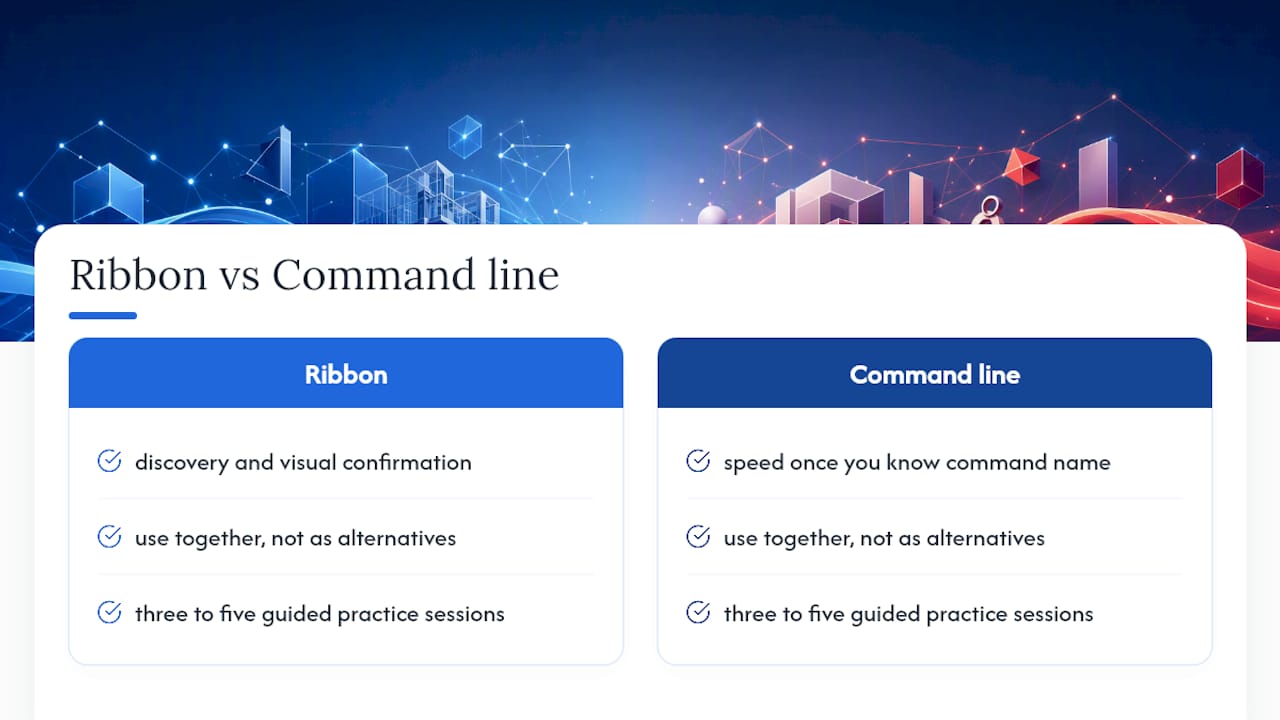
New users typically need three to five guided practice sessions to stop consciously thinking about where commands are and start reaching for them automatically. That’s not a long time. The exercises in this guide cover the core of that learning arc. The jump from “I know where things are” to “I never think about where things are” happens faster than most people expect, especially when the ribbon is customized to match how you actually work rather than how Autodesk imagined you might.
One thing worth saying plainly: use the ribbon and the Command line together, not as alternatives. The ribbon is for discovery and visual confirmation. The Command line is for speed once you know the command name. Treating them as competing interfaces is a beginner mistake that experienced drafters don’t make.
S15studio’s AutoCAD training goes deeper than this guide
Knowing the ribbon’s layout is the starting point. Using it efficiently across real architectural drawings, with a custom workspace saved and exported, is where the productivity gains actually show up. S15studio’s AutoCAD mastery course, taught by Autodesk Certified Trainer Steve Fagan, covers exactly that progression with hands-on project files you work through from day one.

The course includes ribbon customization exercises, .cuix export and import walkthroughs, workspace management for architectural workflows, and exam preparation for the Autodesk Certified User credential. You get lifetime access to all materials, downloadable PDF notes, and direct trainer support. For those who want structured, project-based AutoCAD training rather than scattered tutorials, the complete Revit and AutoCAD training package pairs AutoCAD ribbon and workspace mastery with Revit fundamentals in a single career-focused program. Start with the course that matches your current level and work through it at your own pace.
Sources
The following Autodesk resources were used as primary references throughout this guide and are worth bookmarking for ongoing reference:
Back up your custom .cuix file to a separate folder before making large-scale changes to the ribbon. A workspace reset restores defaults but cannot recover unsaved customizations.
Recommended
Comments