
Revit Quantity Takeoff: Practical Guide for BIM Professionals


A Revit quantity takeoff is the process of extracting material and element quantities directly from an Autodesk Revit BIM model using Schedule/Quantities or Material Takeoff schedules, giving architects, engineers, and BIM specialists a model-driven alternative to manual 2D measurement. Revit is well-suited for preliminary estimates and early-stage cost checks, but for formal bids and final pricing, most practitioners export the data into Excel or a dedicated 5D estimating platform rather than treating Revit as the end point.
The core advantage is live linkage: because Revit schedules update automatically as the model changes, you avoid the version-drift that plagues spreadsheet-based manual takeoffs. That said, the reliability of any quantity output is only as good as the model behind it. Garbage in, garbage out applies here more literally than almost anywhere else in BIM.
S15studio, founded by Autodesk Certified Trainer Steve Fagan, teaches this workflow as part of its project-based Revit courses, and the guidance below reflects the same practitioner-focused approach used in those lessons.
Table of Contents
What is a Revit quantity takeoff, and how do you run one quickly?
Before diving into the detailed walkthrough, here is the sequence at a glance. Run through this checklist every time you start a new takeoff.
Pre-schedule model checks:
Confirm all elements have material assignments (walls, floors, roofs, structural members)
Verify project units match your estimating standard (cubic yards vs. cubic feet, square feet vs. square meters)
Check that linked models are included or excluded intentionally
Confirm phase and level assignments are correct for every element category you plan to schedule
Quick-start sequence:
View → Schedules → Schedule/Quantities or Material Takeoff
Select the element category (Walls, Floors, Doors, etc.)
Add fields: Family & Type, Material: Name, Material: Volume, Material: Area, Level, Phase, Count
Set filters for Phase and Level to exclude unintended elements
Sort/group by Material: Name or Family & Type; enable grand totals
Toggle off “Itemize every instance” for consolidated BOQ-style output
Add a calculated value field for unit cost if needed
Export via File → Export → Reports → Schedule (.txt) for Excel import
Common fields to add:
Family & Type
Material: Name
Material: Volume / Material: Area
Level
Phase Created
Count
Pro Tip: Name your schedule with a version suffix and date from day one (e.g., “Wall Material Takeoff_v01_2026-03”). When the model updates and you regenerate, you will know exactly which export the estimator is working from.
Schedule/Quantities vs. Material Takeoff: which one do you need?
Revit’s Material Takeoff breaks compound elements into their material subcomponents, returning fields like Material: Name, Material: Area, and Material: Volume. Schedule/Quantities, by contrast, returns whole-element measures: counts, total area, total length, and volume for the element as a single unit.
The practical difference matters a lot for estimating. A wall in Revit is typically a compound assembly: concrete block, rigid insulation, air gap, plasterboard. A Schedule/Quantities view gives you the total wall area. A Material Takeoff gives you the concrete volume, the insulation area, and the plasterboard area as separate line items. For a quantity surveyor pricing individual trades, the Material Takeoff is usually the right tool.
Use case | Schedule type | Key fields returned |
Door and window counts | Schedule/Quantities | Count, Family & Type, Level |
Wall area by type | Schedule/Quantities | Area, Family & Type, Volume |
Concrete volume in walls | Material Takeoff | Material: Name, Material: Volume |
Insulation area by layer | Material Takeoff | Material: Name, Material: Area |
Structural steel tonnage | Material Takeoff | Material: Name, Material: Volume |
Floor finish area by room | Material Takeoff | Material: Name, Material: Area |
When phasing and linked models change the picture:
Phasing filters are one of the most commonly missed settings. If you are working on a renovation, your model likely contains existing elements, demolished elements, and new construction. A schedule without a Phase filter will pull all three, inflating your new-work quantities significantly. Filter by Phase Created = New Construction (or your project’s equivalent phase name) to isolate only what is being built.
Linked models add another layer. If the structural engineer’s model is linked into the architectural model, structural columns and beams may appear in both. Decide which model owns each category before you schedule, and filter or exclude accordingly.
Scenario | Filter to apply | Why it matters |
Renovation project | Phase Created = New Construction | Excludes existing and demo elements |
New build, multi-level | Level = [specific level] | Isolates quantities per floor for trade pricing |
Linked structural model | Exclude structural categories from arch schedule | Prevents double-counting columns/beams |
Phased demolition | Phase Created = Demolition | Separates demo quantities for separate pricing |
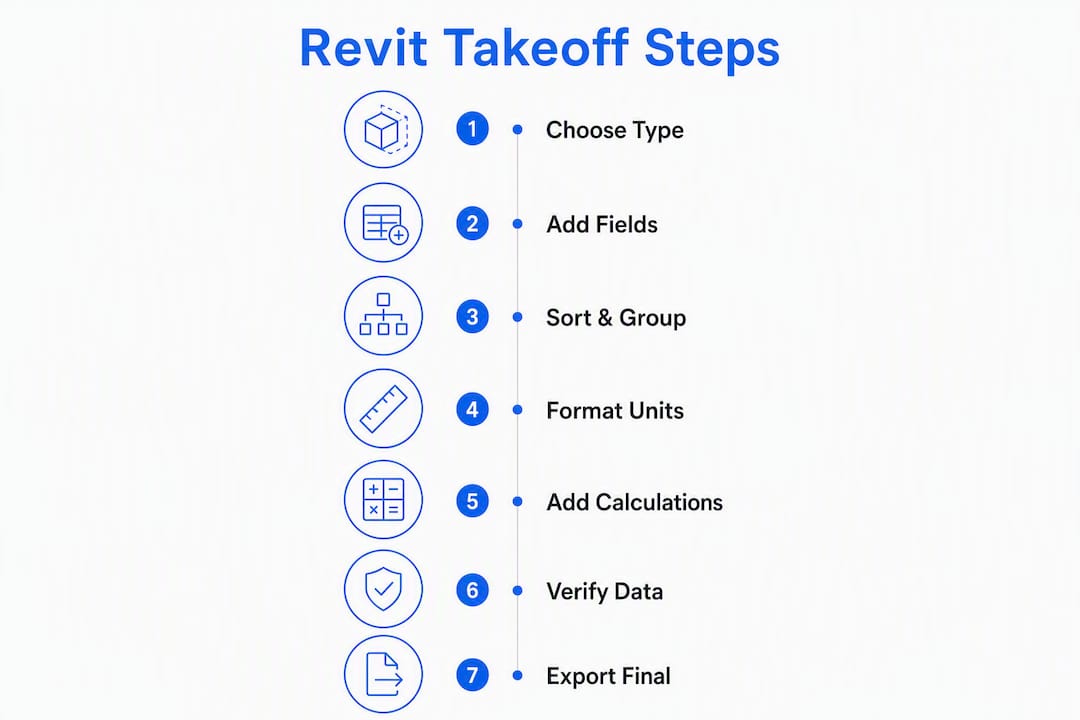
How to build a reliable quantity takeoff in Revit, step by step
This walkthrough follows the standard Revit scheduling workflow but adds the practitioner details that tutorials often skip.
Step 1: Choose your schedule type and category

Go to View → Schedules → Material Takeoff for material-level quantities, or Schedule/Quantities for element-level counts and areas. Name the schedule immediately using a clear convention: “Walls Material Takeoff” or “Doors Schedule v01.” Vague names like “Schedule 1” cause confusion the moment a second person opens the file.
Step 2: Add the right fields
In the Fields tab, add the following in order:
Field name | What it measures | Typical unit |
Family & Type | Element type identity | Text |
Material: Name | Material layer name | Text |
Material: Volume | Volume of that material layer | CF or CY |
Material: Area | Surface area of that material layer | SF |
Level | Which floor the element sits on | Text |
Phase Created | Which project phase created the element | Text |
Count | Number of element instances | Integer |
Comments | Free-text notes field | Text |
Step 3: Sorting and grouping
Open the Sorting/Grouping tab. Set the primary sort to Material: Name (for material takeoffs) or Family & Type (for element schedules). Enable “Grand Totals” at the bottom. This is where most beginners make their first mistake: leaving “Itemize every instance” checked. Turn it off for BOQ-style consolidated totals. Leave it on only when you need a line-by-line QA list or fabrication tracker.
Step 4: Format units and enable Calculate Totals

In the Formatting tab, select each numeric field (Material: Volume, Material: Area, Count) and check “Calculate Totals.” Without this, Revit shows individual values but no subtotals or grand totals, which makes the schedule useless for estimating. Set units to match your project standard: cubic feet, cubic yards, or square feet.
Step 5: Add a calculated cost field
Go to Fields → Calculated Value. Name it “Estimated Cost” and set the type to Currency. Here is where Revit’s unit handling creates a common headache. You cannot directly multiply a volume (which carries dimensions) by a currency rate. The workaround is to make the quantity dimensionless first: divide Material: Volume by 1 (expressed in your project’s volume unit, e.g., 1 CF) before multiplying by the unit rate. The formula looks like: (Material: Volume / 1) * UnitRate. This strips the dimension and lets Revit accept the currency multiplication.
Step 6: Set filters for phasing, levels, and linked models
In the Filter tab, add:
Phase Created = New Construction (or your phase name)
Level = [target level] if you want per-floor quantities
Workset filters if your project uses worksets to separate disciplines
For linked models, use the Include Elements in Links option carefully. If the structural model is linked, either exclude structural categories from your architectural schedule or coordinate with the structural team to confirm which model is the source of truth for each category.
Step 7: Verify before you export
Cross-check at least one element type manually. Pick a wall type, note its dimensions from the model, and calculate the expected volume by hand. Compare that to the schedule total. A 5–10% variance is usually rounding; anything larger points to a model issue (missing material assignment, duplicate elements, or a phase filter problem). This check takes five minutes and saves hours of downstream confusion.
Pro Tip: Create a simple Revit view filter that highlights elements with no material assigned (use a filter rule: Material: Name = “”). Any element that turns bright red in that view needs a material assignment before the takeoff is trustworthy.
What model health issues will break your takeoff?
Model quality determines takeoff reliability more than any other single factor. A well-structured schedule on a poorly built model produces numbers that look authoritative but are wrong.
Common model issues that invalidate takeoffs:
Missing material assignments: Elements with no material return zero volume and zero area in a Material Takeoff. A wall that shows 0 CF of concrete is not a Revit bug; it means the wall type has no material defined in its layers.
Placeholder or in-place geometry: In-place families and generic extrusions often lack proper material assignments and do not schedule reliably. Replace them with loadable families wherever possible.
Incorrect level assignments: An element assigned to the wrong level will appear in the wrong floor’s schedule. This is especially common with elements that span levels (stairs, ramps, curtain walls).
Inconsistent family naming: If the same door type appears under three different family names due to imports or team inconsistency, your schedule will show three separate line items instead of one consolidated count.
Duplicate elements from linked models: Without careful filter management, the same structural column can appear in both the architectural and structural schedules, doubling its volume in any cross-model takeoff.
Wrong project units: If the project was set up in metric but your estimator works in imperial, every exported figure needs conversion. Set units correctly at project setup, not after the model is built.
Pre-export QA checklist:
Run a material assignment check (view filter or Dynamo script)
Confirm project units in Manage → Project Units
Review phase assignments for all scheduled categories
Verify linked model inclusion/exclusion decisions are documented
Spot-check at least three element types against manual geometry calculations
Confirm family naming conventions are consistent across the team
Avoiding common modeling mistakes from the start of a project is far less painful than fixing them when the quantity surveyor is waiting for numbers.
Pro Tip: A simple Dynamo script can flag all elements in a given category where the Material: Name parameter is empty. Run it as part of your project QA routine, not just before takeoffs. Catching missing materials at week two is a five-minute fix; catching them at tender stage is a day’s work.
How do you get Revit quantities into a cost estimate?
Revit is the data source, not the final estimating environment for most professional workflows. The export step is where that handoff happens.
Export options:
Copy/paste from the schedule view: Fast for small schedules, unreliable for large ones. Formatting often breaks in Excel.
File → Export → Reports → Schedule (.txt): The recommended path. Produces a tab-delimited text file that imports cleanly into Excel. This is the method most practitioners use for formal handoffs.
Direct Excel integration via add-ins: Some third-party Revit add-ins export directly to formatted Excel workbooks, preserving column headers and grouping. Useful for offices that run the same schedule format repeatedly.
Recommended post-export workflow:
Once the .txt file is in Excel, the real work begins. Raw Revit quantities are design-intent figures; they do not include waste, overlap, or trade-specific adjustments.
Revit field | Excel column | Estimator action |
Material: Name | Material Description | Map to trade/CSI division |
Material: Volume (CF) | Quantity (CF) | Apply waste factor (typically 5–15%) |
Material: Area (SF) | Area (SF) | Apply coverage rate for finishes |
Family & Type | Element Type | Group by specification section |
Level | Floor | Allocate to floor-by-floor cost plan |
Estimated Cost (if added) | Preliminary Cost | Cross-check against unit rate database |
After mapping columns, apply waste factors appropriate to each material (concrete typically 5–10%, framing lumber 10–15%), group quantities by trade or CSI division, and import into your estimating platform or BOQ template. For contractor-level bids, a dedicated estimating tool handles the pricing database, subcontractor breakdowns, and markup logic that Revit cannot.
Pro Tip: Always note the Revit version and export date on the Excel file tab. When the model updates and you re-export, the estimator needs to know which version of quantities they are pricing. A simple header row with “Exported from Revit 2026, Model v03, March 15, 2026” prevents the wrong-version problem that causes real budget errors on live projects. For contractor estimating workflows, QuoteLock is one example of a platform that accepts structured quantity inputs and handles the pricing and markup side of the estimate.
What accuracy can you expect, and what are the common pitfalls?
Model-based takeoffs from a well-built Revit model are more accurate than 2D manual measurement for design-intent quantities. They are not a substitute for a specialist 5D estimating platform when a formal bid is on the line.
The accuracy ceiling is set by the model, not by Revit’s scheduling engine. A model built to LOD 300 with complete material assignments will produce reliable preliminary quantities. A model built to LOD 200 with generic wall types and no material layers will produce numbers that look precise but are essentially guesses.
Common pitfalls:
Double-counting linked elements: The single most common source of inflated quantities on multi-discipline projects. Decide ownership of each category before scheduling.
“Itemize every instance” left on: Produces a schedule with hundreds of rows and no subtotals. Estimators cannot use it without significant manual cleanup.
Unit mismatches on export: Revit exports in project units. If your project is in cubic feet and your estimator prices in cubic yards, every concrete volume is off by a factor of 27.
Missing material assignments: Produces zero-volume line items that look like the material does not exist in the model.
Inconsistent family naming: Splits what should be one line item into several, making it impossible to get a clean total for a given element type.
No phase filter applied: Includes existing and demolished elements in new-work quantities.
Best practices to reduce errors:
Set project units and material assignments at project setup, not at takeoff time
Standardize family naming conventions across the team from day one
Run a model health check before every scheduled export
Cross-check at least three element types manually before sharing results
Document which model version and export date correspond to each estimate
Use multi-discipline model coordination to resolve clashes and eliminate duplicate elements before scheduling
The honest answer on accuracy: for early-stage cost planning and design-option comparisons, Revit quantity estimation is fast, consistent, and good enough to make real decisions. For tender-stage pricing, treat Revit output as the starting point and apply professional estimating judgment on top of it.
What templates, scripts, and tools make takeoffs faster?
The biggest time-saver in a Revit takeoff workflow is not a new tool; it is a well-built schedule template that your office reuses across projects.
What a reusable schedule template should include:
Standard field sets for each common category (Walls, Floors, Roofs, Doors, Windows, Structural Framing)
Consistent naming conventions (schedule name format, field labels)
Pre-set sort/group configurations with grand totals enabled
Unit formats locked to office standard (SF, CF, or metric equivalents)
BOQ-ready column order matching your estimating template
Phase and level filter placeholders (update per project, not per schedule)
Transfer templates between projects by using the Transfer Project Standards function (Manage → Transfer Project Standards → Schedule Views) or by copying views from a template project file.
Where Dynamo adds value:
Dynamo scripts can automate several QA and scheduling tasks that are tedious to do manually:
Flag all elements where Material: Name is empty (the missing-material check)
Batch-create standard schedules from a list of categories
Export multiple schedules to separate Excel tabs in one operation
Convert units within parameter values before export
You do not need to write these scripts from scratch. The Autodesk App Store and the Dynamo Package Manager both host community-built scripts for common scheduling and QA tasks.
Categories of third-party tools worth knowing:
Export utilities: Add-ins that export Revit schedules directly to formatted Excel workbooks, preserving grouping and headers
5D BIM connectors: Plugins that maintain a live link between Revit model parameters and an external estimating platform, so quantity updates flow through automatically when the model changes
Power BI dashboards: Connect to Revit data via intermediate formats to visualize quantity trends across project phases or design options
For offices running the same project type repeatedly, a standardized schedule template library saves hours per project and reduces the errors that come from rebuilding schedules from scratch each time.
Pro Tip: Save your best-performing schedule templates in a dedicated Revit template project file (.rte), not in a live project. That way, new projects inherit clean, tested schedules without carrying over project-specific filters or phase names that will not apply.
Key Takeaways
A Revit quantity takeoff extracts reliable material and element quantities from a BIM model, but its accuracy depends entirely on model health, correct phasing filters, and a structured export workflow before any cost estimate is produced.
Point | Details |
Definition | A Revit quantity takeoff uses Schedule/Quantities or Material Takeoff schedules to extract element and material data directly from the BIM model. |
Right schedule type | Use Material Takeoff for material-layer quantities (concrete, insulation); use Schedule/Quantities for whole-element counts and areas. |
Model health first | Missing material assignments, wrong phase filters, or duplicate linked elements will produce unreliable quantities before a single number reaches the estimator. |
Export workflow | Export via File → Export → Reports → Schedule (.txt), then apply waste factors, trade grouping, and unit checks in Excel before formal pricing. |
S15studio training | S15studio’s project-based Revit courses teach scheduling, model health, and export workflows hands-on, with downloadable templates and direct trainer support. |
The part most tutorials skip
Most Revit takeoff tutorials show you where to click. They rarely tell you what breaks in practice, and that gap costs teams real money.
The most persistent problem is not a software limitation; it is a workflow assumption. Teams assume that because Revit is a BIM tool, the model is automatically ready for quantity extraction. It rarely is at the point when someone first asks for numbers. Material assignments get skipped during design development because they slow down modeling. Phase names get left at defaults because no one set up the project template properly. Family names drift because three people modeled the same element type under different names.
By the time the quantity surveyor asks for a takeoff, the model has weeks of accumulated shortcuts baked into it. Fixing those issues under deadline pressure is where projects lose time and trust.
The practical answer is to treat model health as a continuous discipline, not a pre-export checklist. Assign materials when you build the wall type, not when someone asks for quantities. Set phase names in the project template before anyone models a single element. Agree on family naming conventions in week one. These habits cost almost nothing during design and save significant cleanup time at every subsequent milestone.
On the question of when to move from Revit exports to a dedicated 5D platform: the answer is usually “earlier than you think.” If the project has reached design development and the client needs a cost plan that will inform a real budget decision, Revit quantities are the input, not the output. A specialist estimating tool applies the pricing database, regional labor rates, waste factors, and markup logic that Revit cannot. Revit gives you the geometry; the estimator gives you the cost.
Build your Revit takeoff skills with S15studio
Knowing the steps is one thing. Executing them on a real project model, under real project conditions, is where the skill actually develops.

S15studio’s Revit beginner-to-intermediate course covers scheduling and quantity workflows as part of a project-based curriculum, so you practice on realistic models rather than toy exercises. The complete Revit and AutoCAD training bundle adds ACU exam preparation and downloadable schedule templates you can adapt directly to your office standard. Every course includes direct support from Steve Fagan, an Autodesk Certified Trainer, and lifetime access to materials so you can revisit the takeoff workflow whenever a new project demands it. Start with the course that matches your current level and work through the scheduling modules at your own pace.
Useful sources and official references
Official Autodesk documentation:
Material Takeoff Schedules (Autodesk Help) — official reference for Material Takeoff schedule setup, fields, and functionality
Calculated Values in Schedules (Autodesk Help) — official documentation on calculated value fields and the unit-mismatch workaround
Estimating with Revit (Autodesk Learning Module) — Autodesk’s own training module on quantity extraction and estimating workflows
Practitioner references:
S15studio resources:
S15studio blog — articles and tutorials on Revit workflows, modeling practices, and BIM skills
Common Revit Modeling Mistakes Architects Must Avoid — practical guide to the modeling habits that protect schedule accuracy
S15studio YouTube channel — free video walkthroughs of Revit workflows including scheduling and documentation
Recommended
Comments