AutoCAD Drawing Standards Explained for Design Professionals
- Steve Fagan

- 23 hours ago
- 9 min read

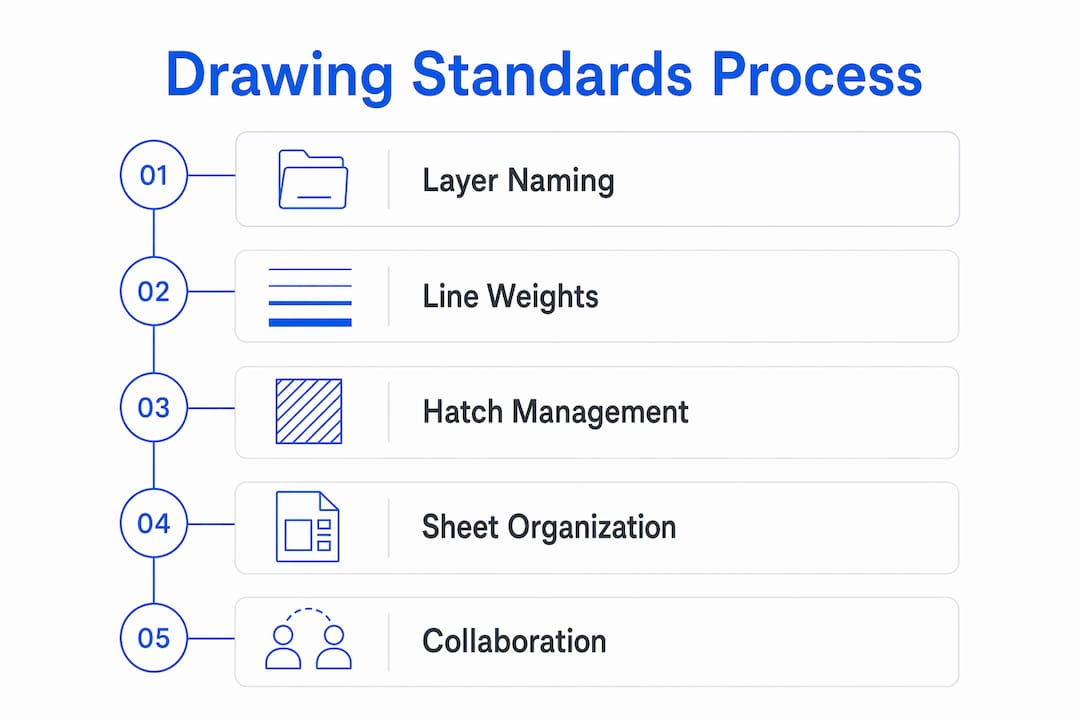
AutoCAD drawing standards are predefined rules that govern how technical drawings are organized, named, and presented. These rules cover layer names, line weights, colors, hatch patterns, and sheet numbering. Bodies like the American Institute of Architects (AIA), the National CAD Standard (NCS), and ISO define the most widely adopted frameworks. When you apply these standards correctly, your drawings communicate clearly to every consultant, contractor, and reviewer who opens the file. This article covers the core elements of AutoCAD drawing standards explained in practical terms, with examples drawn directly from AIA and NCS guidelines.
What are AutoCAD drawing standards and why do they matter?
AutoCAD drawing standards are a documented set of rules that control every visual and organizational element in a DWG file. They define which layers exist, what colors those layers use, how thick lines print, and how sheets are numbered across a project set. Without them, each draughtsman on a team makes independent decisions, and the result is a drawing set that no one else can read quickly or confidently.
The AIA and the National CAD Standard are the two dominant frameworks in American architectural practice. ISO standards apply more broadly across engineering disciplines and international projects. AutoCAD itself supports standards enforcement through DWS files. DWS files store layer names, colors, and line weights without containing any drawing geometry, so they act as a rulebook that AutoCAD checks your DWG against. That automated checking catches deviations before a drawing set goes out for review.

The practical payoff is significant. Consistent layering and standardized line weights specified by bodies like the AIA produce faster drawing reviews and fewer coordination errors. Fewer errors mean fewer RFIs on site and fewer costly revisions during construction. For architects and draughtsmen working on multi-discipline projects, that efficiency is not a minor convenience. It is a direct impact on project cost and schedule.
What are AutoCAD layer standards and naming conventions?
Layers are the foundation of every well-organized AutoCAD drawing. Each layer groups related drawing elements, controls their visual properties, and lets you isolate or freeze content by discipline or function. Without a naming convention, layers accumulate with ad hoc names like “new layer 1” or “misc,” and the file becomes unreadable to anyone outside the original draughtsman’s workflow.
The AIA layering system is the standard reference for architectural CAD work in the United States. AIA provides over 300 label names built from a discipline initial followed by a function abbreviation. Common examples include:
A-WALL for architectural walls
A-DOOR for doors
A-GLAZ for glazing and windows
E-LITE for electrical lighting
S-COLS for structural columns
P-PIPE for plumbing piping
The discipline prefix tells every team member which trade owns the element. The function suffix tells them what the element is. That two-part logic makes the layer list self-documenting.
Color assignments in the AIA system are not decorative. Each color maps to a specific pen weight in the CTB plot style table, so the color you assign to a layer directly controls how thick that layer prints. Red (color 1) typically maps to a heavy pen for walls. Yellow (color 2) maps to a medium pen for secondary elements. Green (color 3) maps to a lighter pen for annotations. This color-to-weight relationship is what makes AIA/NCS layering standards so effective for cross-disciplinary coordination.
Pro Tip: Create a layer template file (DWT) that pre-loads all your standard layers with correct colors, line weights, and descriptions. Every new project starts from that template, so standards are enforced from the first line drawn, not retrofitted at the end.
Line weight assignments follow the same hierarchy as colors. Walls and columns carry the heaviest weights to read as primary structure. Doors, windows, and casework sit in the middle range. Dimensions, notes, and hatch patterns use the lightest weights so they recede visually behind the building elements they describe.
How do line weights and colors ensure clarity in AutoCAD drawings?
Line weight hierarchy is the visual grammar of a technical drawing. A drawing where walls, doors, and dimensions all print at the same weight forces the reader to decode the drawing rather than read it. The hierarchy does the interpretation work automatically.
The standard weights used in architectural practice follow a clear progression. Walls and columns use 0.5–0.7 mm lines, doors and windows use 0.3–0.4 mm lines, and text and dimensions use 0.18–0.25 mm lines. Those three tiers create an immediate visual hierarchy where structure reads first, components read second, and annotations read last. That reading order matches how a contractor or reviewer actually uses the drawing.
Color-to-weight mapping through CTB plot style tables is the mechanism that connects on-screen color to printed line weight. Colors assigned to layers must be compatible with CTB plot styles to produce correct printed line weights. This means your on-screen drawing can use bright, distinguishable colors for easy editing while the printed output follows a controlled grayscale or black-and-white weight scheme. The two are independent, which is one of AutoCAD’s most useful features for standards compliance.
Common mistakes in line weight management include:
Assigning line weights directly to objects instead of to layers, which breaks the layer-based control system
Using too many weight values, which creates visual noise instead of a clear hierarchy
Failing to match layer colors to the CTB file, so printed weights differ from what the standard specifies
Plotting without reviewing a print preview, which lets weight errors reach the client undetected
The pen assignment for dimensions deserves specific attention. A number 4 pen (0.18 mm) is the standard choice for dimension lines and text in most architectural offices. That weight keeps annotations readable without competing visually with the building elements they describe.
What are AutoCAD hatch standards and how to manage them effectively?
Hatch patterns communicate material and surface information without written labels. A concrete hatch, a brick hatch, and an insulation hatch each tell the reader something specific about construction. When hatch parameters are inconsistent, those patterns become visual noise rather than information.
Setting default hatch parameters before you start a project prevents most hatch problems. The four key system variables are:
HPNAME sets the default pattern name, so every new hatch starts with the correct pattern for your discipline.
HPSCALE sets the default scale, which controls how large the pattern repeats relative to your drawing scale.
HPANG sets the default angle, which matters for materials like brick where orientation carries meaning.
HPASSOC controls whether the hatch stays linked to its boundary. Setting HPASSOC=1 ensures the hatch updates automatically when you edit the boundary geometry.
Hatch association is the most overlooked setting in standard practice. When HPASSOC is set to 0, or when a hatch loses its association after editing, the hatch no longer responds to boundary changes. You end up with hatch patterns that bleed outside walls or leave gaps at corners. Using HATCHEDIT and the Reassociate option fixes disassociated hatches and restores the link between pattern and boundary.
Place all hatch elements on a dedicated hatch layer, such as A-HATCH, and set that layer’s plot transparency to a low value. Transparency lets hatches print lighter than solid elements without changing their color assignment. This keeps floor plans readable when hatches cover large areas.
Pro Tip: If a hatch pattern looks correct on screen but prints incorrectly, check the HPSCALE value against your drawing’s plot scale. A hatch set at scale 1 in a drawing plotted at 1:100 will print far too dense. Match HPSCALE to your intended plot scale from the start.
How should drawing sets and sheets be organized in AutoCAD?
Sheet organization is the architecture of your drawing set. A well-organized set lets any reviewer find the floor plan, the electrical layout, or the structural details without hunting through a random sequence of sheets. The National CAD Standard defines the rules for how sheets are named and ordered.
NCS sheet identification uses three components: a discipline designator, a sheet type designator, and a sequence number. The discipline designator is a single letter (A for architectural, S for structural, E for electrical, P for plumbing, M for mechanical). The sheet type designator is a single digit (0 for general, 1 for plans, 2 for elevations, 3 for sections, 4 for large-scale views, 5 for details). The sequence number is a two-digit number.
Sheet ID | Discipline | Sheet Type | Description |
A-101 | Architectural | Plans | Floor plan, level 1 |
A-201 | Architectural | Elevations | North and south elevations |
S-101 | Structural | Plans | Foundation plan |
E-101 | Electrical | Plans | Lighting plan, level 1 |
M-101 | Mechanical | Plans | HVAC plan, level 1 |
The NCS also defines the order in which discipline subsets appear in the set. General sheets (G) come first, followed by civil ©, landscape (L), architectural (A), structural (S), mechanical (M), plumbing (P), and electrical (E). That sequence is not arbitrary. It mirrors the order in which disciplines are typically reviewed during permitting and construction administration.
Mixing abbreviated and standard sheet numbering within a single drawing set creates confusion and should be avoided. If your project uses the standard three-component format, every sheet in the set must follow that format. Inconsistency signals poor quality control to reviewers and creates real problems when sheets are referenced across disciplines.
For architects new to AutoCAD fundamentals, understanding sheet organization early prevents expensive reorganization later in a project.
Key takeaways
Applying AutoCAD drawing standards consistently, using AIA layer naming, NCS sheet organization, and correct CTB plot style setup, is the single most effective way to reduce coordination errors and speed up drawing reviews.
Point | Details |
Layer naming follows AIA conventions | Use discipline prefix plus function suffix, such as A-WALL or E-LITE, for every layer. |
Line weights create visual hierarchy | Walls print at 0.5–0.7 mm, doors at 0.3–0.4 mm, and text at 0.18–0.25 mm. |
CTB files control printed output | Layer colors must match your CTB plot style table to produce correct printed line weights. |
Hatch association prevents errors | Set HPASSOC=1 and use HATCHEDIT Reassociate to keep hatches linked to their boundaries. |
NCS defines sheet order and naming | Use discipline designator, sheet type, and sequence number consistently across the full set. |
Why standards only work when the whole team commits
The hardest part of implementing drawing standards is not learning the rules. It is getting every person on the team to follow them without exception. I have seen projects where one draughtsman applied AIA layer names correctly while another used freehand layer names on the same file. The result was a drawing set that looked professional on the surface but fell apart the moment a consultant tried to isolate a discipline layer. The standards only deliver their value when they are applied universally.
The practical fix is documentation and a template file. Write a one-page project CAD standard that lists your layer names, colors, line weights, and hatch defaults. Attach it to the project folder. Give every team member the DWT template file on day one. Then audit the files at the midpoint of each project phase, not at the end. Catching a non-standard layer at the schematic design stage takes five minutes to fix. Catching it during construction documents takes an afternoon.
Training matters more than most firms acknowledge. Draughtsmen who understand why AutoCAD and Revit are essential tools for architectural practice apply standards with more care because they understand the downstream consequences of getting them wrong. Standards are not bureaucratic overhead. They are the shared language that makes collaboration possible.
My honest recommendation is to treat your CAD standard as a living document. Review it at the end of each project. Add rules that solved problems you encountered. Remove rules that nobody followed because they were impractical. A standard that evolves with your practice is far more useful than a rigid document that collects dust.
— Steve
Build your AutoCAD skills with S15studio
Design professionals who want to apply drawing standards with confidence need more than a reference document. They need practice on real project workflows.

S15studio’s Mastering AutoCAD course covers layer management, line weight setup, CTB plot styles, hatch standards, and sheet organization in a structured, project-based format. The course is built by Autodesk Certified Trainer Steve Fagan and designed specifically for architects and draughtsmen working in professional practice. For those who want both AutoCAD and Revit covered in one program, the complete AutoCAD and Revit training package provides comprehensive coverage of both platforms, including standards application and professional workflows.
FAQ
What are AutoCAD drawing standards?
AutoCAD drawing standards are documented rules for layer names, colors, line weights, hatch patterns, and sheet numbering that keep technical drawings consistent and readable across a project team.
What is the AIA layering standard in AutoCAD?
The AIA layering standard defines over 300 layer names built from a discipline initial and a function abbreviation, such as A-WALL for architectural walls, with assigned colors and line weights for each layer.
How do CTB plot style tables work with layer colors?
CTB files map layer colors to printed line weights, so the color you assign to a layer in AutoCAD determines how thick that layer prints on paper.
What does HPASSOC do in AutoCAD?
HPASSOC is a system variable that controls hatch association. Setting it to 1 keeps hatch patterns linked to their boundary geometry so they update automatically when the boundary changes.
How does the National CAD Standard organize drawing sheets?
The NCS uses a three-part sheet ID combining a discipline designator, a sheet type designator, and a sequence number, such as A-101 for the first architectural floor plan, with disciplines ordered from general to electrical across the full set.
Recommended
Comments