
AutoCAD Data Extraction Explained for Architects & Engineers


AutoCAD Data Extraction is a built-in wizard that pulls object properties directly from your drawings and exports them to a table or external file. Launch it by typing DATAEXTRACTION at the command line, or go to Insert → Link & Extraction → Extract Data on the ribbon. Three reasons it belongs in every project workflow:
Speed: Replaces manual counting and data entry for material schedules, BOMs, and quantity takeoffs
Accuracy: Eliminates transcription errors by reading attribute values straight from the drawing objects
Reusability: Save your settings as a .dxe template and reuse it across every project without reconfiguring from scratch
Table of Contents
How does AutoCAD data extraction work? The 8-step wizard
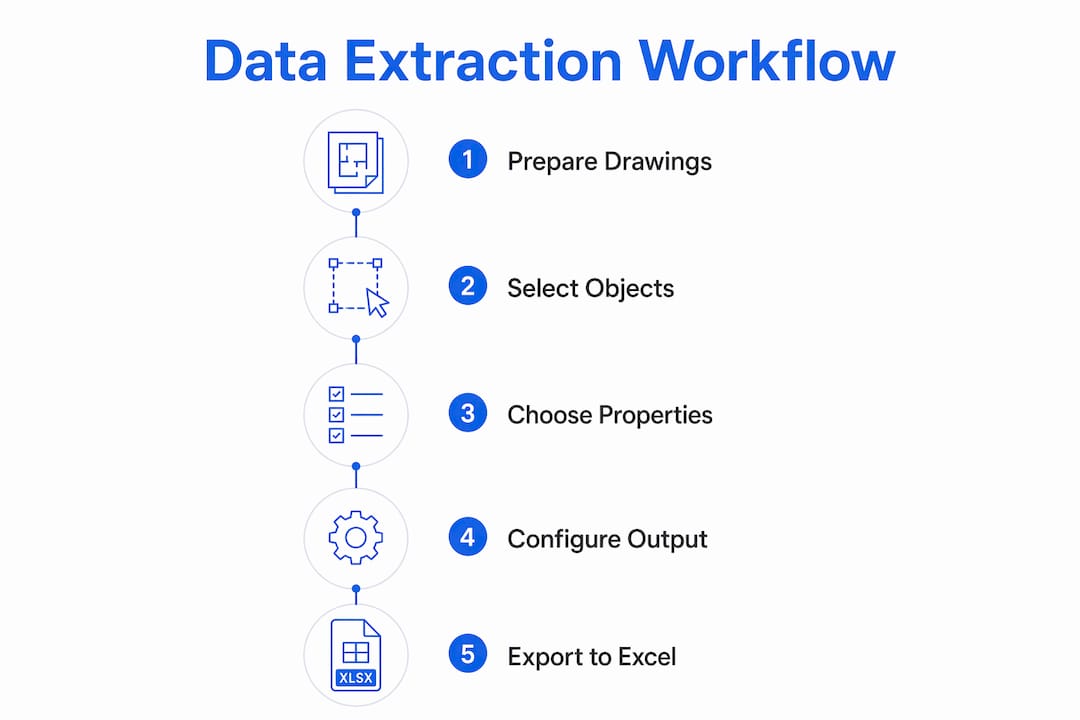
The DATAEXTRACTION wizard walks you through eight sequential windows. Here is exactly what happens at each step.
Create or edit a DXE file. Choose “Create a new data extraction” or open an existing .dxe template. Naming it clearly (e.g., DoorSchedule_v1.dxe) saves time later.
Select data source. Point the wizard at the current drawing, specific files, or an entire folder. Use “Add Folder” and check “Include subfolders” for batch extractions across a project set.
Pro Tip: For large projects, add the entire project folder here rather than individual files. You can always filter down in later steps.
Choose object types. The wizard lists every object type found in the source. Check only the types you need — blocks, polylines, lines, or text. Unchecking irrelevant types keeps the table clean.
Select properties. For each object type, pick which properties to extract: layer, color, length, area, block attribute tags, insertion point, handle, and more. Deselect anything you will not use in the final table.
Refine data. The Refine Data page lets you rename columns, hide columns, reorder them, combine identical rows, add formula columns (sum, average, min, max), and insert a sum footer row. This is where a raw data dump becomes a readable schedule.
Merge external data. Optionally link an Excel spreadsheet here. You need a matching column in both the drawing data and the spreadsheet — for example, a part number that appears in both. This step is what enables cost lookups and spec data to flow into the same table.
Choose output. Select “Insert data extraction table into drawing,” output to an external file (XLSX, CSV, MDB, or TXT), or both. Each format has a different use case covered in the next section.
Finish. Click Finish and place the table in the drawing, or confirm the file export path. AutoCAD saves the DXE file at this point if you have not already.
Pro Tip: Run a small test extraction on a single drawing before committing to a full folder batch. Catching a missing attribute at step 4 is far less painful than rebuilding a 500-row table.
What object types and properties can you actually extract?
The wizard surfaces properties across several categories. Here is what is available and how it maps to common schedule columns:
Block attributes: tag names and their values (door number, room name, part number, material, finish)
Geometry: length (lines, polylines), area (closed polylines, hatches), perimeter
Object metadata: layer, color, linetype, lineweight, handle, object name
Insertion data: X, Y, Z coordinates of block insertion points
Text content: text string values from single-line and multiline text objects
Custom properties: any user-defined properties attached via extended entity data
Drawing Property | Table Column Example | Typical Use |
Block attribute: DOOR_NO | Door Number | Door schedule |
Block attribute: MATERIAL | Material | BOM / material schedule |
Block attribute: PART_NO | Part Number | Equipment schedule |
Polyline area | Area (sq ft) | Room area takeoff |
Line length | Length (ft) | Wall length schedule |
Layer | Layer | Filter by discipline |
Limitations worth knowing: The wizard cannot extract properties from raster images, OLE objects, or most 3D solid geometry properties beyond basic bounding-box data. If an attribute tag exists in a block definition but has never been populated in the drawing, the extracted cell will be blank. For properties the wizard cannot reach, AutoCAD FIELDS or a LISP/.NET script are the typical workarounds.
Output options and linking to Excel for a single source of truth
Two main output paths exist, and choosing the right one depends on how the data will be used downstream.
Insert table into drawing vs. export to file:
Inserted table: Stays live in the drawing; AutoCAD notifies you when the source data changes and lets you update the table with one click. Best for schedules that need to print with the drawing set.
Export to XLSX/CSV: Gives you a standalone file for cost estimating, sharing with consultants, or feeding into project management tools. Static unless you re-run the extraction or set up a Data Link.
MDB (Access): Useful when multiple drawings feed a shared database; less common in architecture but standard in some infrastructure workflows.
Maintaining a single source of truth with Excel:
The linked Excel workflow is the professional standard for cost-sensitive projects. Here is the core sequence:
Build your master cost or spec spreadsheet in Excel (unit costs, material specs, supplier codes).
In the wizard’s merge step, link that spreadsheet using a matching column (part number, material code).
Insert the combined table into the drawing.
When costs change, update the Excel file. AutoCAD flags the linked table for update; click “Update” and the drawing reflects the new figures immediately.
Pro Tip: Never type unit costs directly into the AutoCAD table. Keep them in Excel only. That way, one update propagates to every drawing that references the same data link.
Common mistakes to avoid and best practices that actually hold up

Most extraction problems trace back to a handful of repeatable errors.
Do / Don’t:
Do use Additional Settings to exclude xrefs when you only want data from the host drawing. Xrefs included by default can flood your table with duplicate rows.
Don’t run an extraction before thawing all relevant layers. Frozen layers are skipped, so block counts will be wrong.
Do populate all block attribute tags before extracting. Blank tags produce blank cells that break formula columns.
Don’t ignore the “Combine identical rows” checkbox on the Refine Data page. Without it, each block instance gets its own row instead of a consolidated count.
Do save your DXE template to a shared network path so the whole team references the same column structure.
Don’t start with a narrow object selection. Start broad, preview the available properties, then filter down. Narrow selections miss attributes you did not know existed.
Pro Tip: Consistent attribute naming standards across your office pay dividends here. If half your door blocks use DOOR_NO and the other half use DoorNumber, the wizard treats them as separate properties.
Three practical mini-workflows you can use right now
Mini-workflow 1: Material schedule
Objects: Closed polylines on a A-ROOM layer representing room boundaries. Properties to extract: Area, layer, and a block attribute called ROOM_NAME. Column set: Room Name | Layer | Area (sq ft) Grouping: Combine identical rows off (each room is unique); add a sum footer on the Area column. Excel formula for total area: =SUM(C2:C50)
Mini-workflow 2: Bill of materials
Objects: Equipment or furniture blocks with attributes PART_NO, DESCRIPTION, MATERIAL. Properties to extract: PART_NO, DESCRIPTION, MATERIAL, Count (via “Combine identical rows”). Column set: Part No. | Description | Material | Count | Unit Cost | Total Cost
Column | Source |
Part No. | Block attribute |
Description | Block attribute |
Material | Block attribute |
Count | Combine identical rows |
Unit Cost | Linked Excel lookup |
Total Cost | Formula column: Count × Unit Cost |
Excel formula for total cost: =D2*E2 (replicated per row, with a SUM footer).
Mini-workflow 3: Quantity takeoff
Objects: Polylines representing walls or structural elements on a specific layer. Properties: Length, layer, linetype (to distinguish wall types). Column set: Layer | Linetype | Total Length (ft) Approach: Export to XLSX, then use =SUMIF(A:A,"A-WALL-EXT",C:C) in Excel to subtotal by wall type. The Refine Data formula columns handle simple sums inside AutoCAD; complex conditional totals are easier in Excel.
Advanced techniques for multi-drawing projects and automation
Scaling extraction to a full project set requires a few extra habits.
Folder-based extraction: At step 2, use “Add Folder” and enable “Include subfolders.” The wizard processes every DWG in the tree and merges results into one table.
Dynamic updates: Inserted tables tied to a DXE file will prompt for an update whenever the source drawing changes. For exported files, you need to re-run the extraction or script it.
Data Link Manager (DATALINK): Use this to manage connections between AutoCAD tables and Excel files independently of the extraction wizard. Useful when the spreadsheet changes frequently but the drawing data does not.
Automation with LISP or .NET: For nightly batch runs or CI/CD-style drawing pipelines, a LISP script can call the extraction silently using a saved DXE template. The FIELDS and API approach suits workflows where specific cell values need to update without a full re-extraction.
Pro Tip: The most repeatable automation pattern is: save a DXE template to a shared path, point a folder watch script at the project folder, and schedule a nightly update. The drawing team never touches the extraction settings.
For students exploring engineering software workflows, understanding how AutoCAD’s extraction tools fit alongside other analysis platforms is increasingly relevant in professional practice.
Pre-extraction checklist for clean, repeatable results
Run through this before launching the wizard on any project drawing.
Thaw and turn on all relevant layers. Frozen or off layers are invisible to the wizard; missing layers mean missing data.
Populate all block attribute tags. Empty tags produce blank cells that break count and formula columns.
Resolve xref attachments. Decide whether to include or exclude xrefs in Additional Settings before you start, not after.
Confirm block naming consistency. Blocks with different names but identical geometry count as separate types; standardize names before extracting.
Save the DXE template path. Store it in the project folder or a shared network location so teammates can reuse it.
Set the table style and scale. Match the table style to your drawing’s annotation scale before inserting so it plots correctly.
Back up the master Excel file. If the linked spreadsheet moves or is renamed, the data link breaks silently.
Key Takeaways
AutoCAD Data Extraction turns drawing objects into structured, updatable data by combining the DATAEXTRACTION wizard with saved DXE templates and linked Excel files.
Point | Details |
Use DXE templates | Save extraction settings to a shared .dxe file so every team member runs identical column structures. |
Scope before extracting | Start with a broad object selection, preview available properties, then filter down to avoid missing attributes. |
Link Excel for costs | Keep unit costs in a master Excel file and link it to the AutoCAD table so one update propagates everywhere. |
Combine identical rows | Always check “Combine identical rows” on the Refine Data page to get consolidated counts instead of per-instance rows. |
S15studio course deliverables | The Mastering AutoCAD course includes downloadable DXE templates and a matching Excel master sheet for immediate project use. |
Why most teams only scratch the surface of data extraction
The wizard looks simple, and that is part of the problem. Because it is easy to get something out of it, most designers stop at a basic block count and never discover what the tool actually does at full stretch.
The real power is not in the extraction itself. It is in the combination: a DXE template that enforces consistent columns, a linked Excel master that holds all the cost and spec data, and a table in the drawing that updates when either source changes. That three-part setup means a design change in the drawing and a price update from the supplier both flow into the same printed schedule automatically. No manual reconciliation.
What students most commonly miss is the merge step. They skip it because it looks optional, and technically it is. But skipping it means typing unit costs into AutoCAD table cells by hand, which defeats the purpose entirely. The moment you link a master Excel sheet, the whole workflow clicks into place.
The second thing people overlook is the DXE template as a project standard. Treat it the way you treat a title block or a layer standard: store it in a shared location, version-control it, and make it part of your project setup checklist. A team that shares one DXE file produces consistent schedules across every drawing without anyone having to remember the column order.
Take your AutoCAD skills further with S15studio
If you want to go beyond the basics and build real project workflows, the Mastering AutoCAD course at S15studio covers the full data extraction workflow with downloadable DXE templates, a pre-built Excel master sheet, and project-based exercises you can adapt directly to your own work. Founded by Autodesk Certified Trainer Steve Fagan, S15studio delivers practical training with lifetime access to all materials, so you can revisit the extraction workflow whenever a new project demands it.

Prefer a combined Revit and AutoCAD path? The Complete Revit and AutoCAD Training package includes certification prep alongside hands-on extraction exercises. Pick the course that fits your current level and get the templates working in your next project.
Useful sources and further reading
DATAEXTRACTION Command — Autodesk Help: Official command reference covering syntax, supported output formats, and ribbon path.
Data Extraction Wizard Details — Autodesk Help: Step-by-step breakdown of every wizard page, including the Refine Data and formula column options.
Data Extraction: Exploring Features and Benefits — Autodesk Blog: Accessible overview of what extraction automates and why linked tables matter for revision management.
AutoCAD Tutorial: Tables and Data Extraction — Engineering.com: Practical tutorial with screenshots covering the wizard and the Excel linking workflow.
Complete Guide to AutoCAD Data Extraction — Scan2CAD: Covers common scoping mistakes and filtering strategies with clear visual examples.
S15studio — Mastering AutoCAD Course: Project-based training with downloadable DXE templates and a matching Excel master sheet included.
Recommended
Comments