
AutoCAD PDF Export Settings Explained for Architects


For final print, use the AutoCAD PDF (High Quality Print) preset at 2400 dpi vector / 600 dpi raster. For field tablets and internal review, switch to AutoCAD PDF (Web and Mobile). For email transmittals where file size matters more than print fidelity, AutoCAD PDF (Smallest File) or a custom low-DPI preset keeps things lean. Those three decisions cover roughly 90% of what architects and CAD technicians actually need from AutoCAD’s PDF export workflow.
Two other choices shape every export:
EXPORTPDF vs PLOT: Use EXPORTPDF (Application Menu > Export > PDF) for fast, preset-driven digital delivery. Use PLOT with a custom PC3 file when you need exact pen assignments via CTB/STB, specific paper sizes, or repeatable print-production output for a wide-format plotter.
Layers and searchable text: Enable “Include layer information” when consultants will use the PDF as a CAD/BIM underlay. Enable font capture (and disable “Convert text to geometry”) when recipients need to search, copy, or mark up text in the PDF.
Pro Tip: Before any major submission, run a single-sheet test export at full scale. Catching a rasterized line or a missing font on one sheet costs seconds; catching it after a 40-sheet batch publish costs an afternoon.
Table of Contents
How to access AutoCAD’s PDF export controls
Three commands get you into PDF export territory, and each one is built for a different job.
EXPORTPDF (Application Menu > Export > PDF or type EXPORTPDF at the command line). This opens the Save as PDF dialog, which lets you set file name, location, quality preset, and page setup. The Options button inside that dialog opens the Export to PDF Options panel, where you control vector/raster DPI, font handling, layer inclusion, and more. This is the fastest route for single-sheet or quick multi-sheet exports.
PLOT (Ctrl+P or type PLOT). The Plot dialog gives you access to PC3 plotter configuration files, CTB/STB pen assignments, custom paper sizes, and plot stamps. When your output needs to match a specific plotter’s behavior or a print house’s pen-weight spec, PLOT is where you do it. The tradeoff is setup time: you configure more, but you control more.
PUBLISH (type PUBLISH or Application Menu > Publish). The Publish dialog is AutoCAD’s batch engine. Select multiple layouts from one or more drawings, set the output device to a PDF PC3, then click Publish Options and check Multi-sheet file to generate a single PDF containing every selected layout in order. This is the right tool for full drawing sets.
Pro Tip: If you find yourself re-entering the same PLOT settings every session, save them as a named Page Setup in the Page Setup Manager (PAGESETUP command). You can then call that setup from either PLOT or EXPORTPDF without re-configuring from scratch.
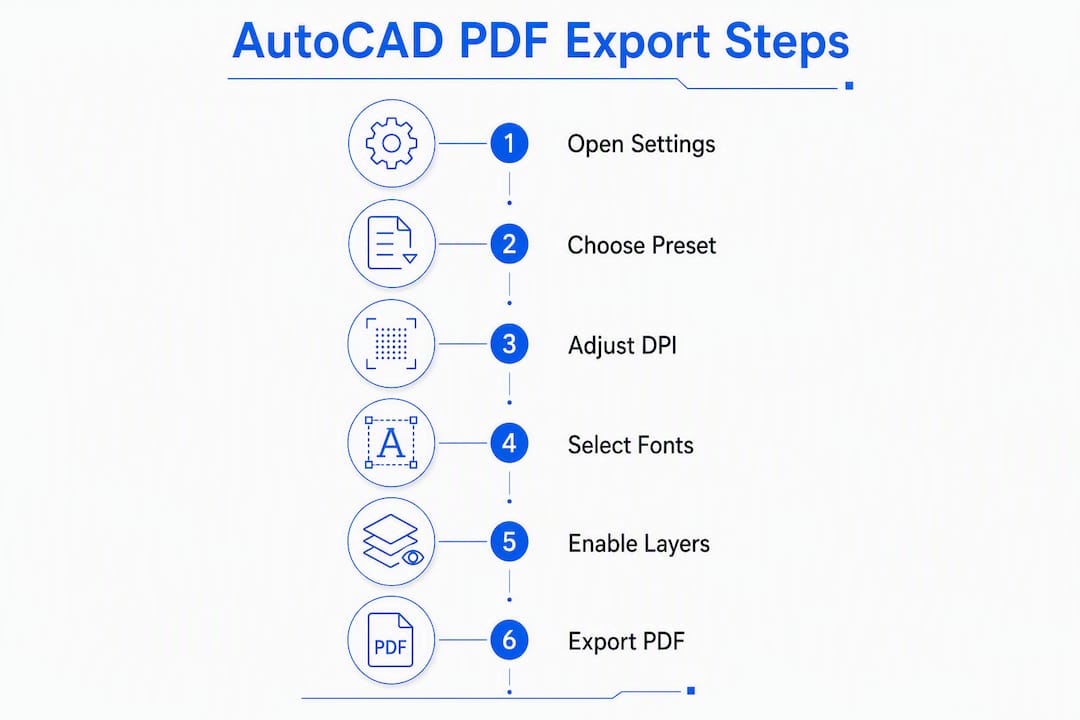
Comparing AutoCAD’s built-in PDF presets
The predefined PDF presets are stored as PC3 plotter configuration files inside the PDF ePlot driver. Each one is a bundle of DPI, font-handling, and layer settings tuned for a specific delivery scenario.

Preset | Best for | Vector DPI | Raster DPI | File size impact | Layers / searchable text |
AutoCAD PDF (High Quality Print) | Final construction docs, print house submission | 2400 | 600 | Largest | Optional / depends on font setting |
AutoCAD PDF (Web and Mobile) | Field tablets, internal review, online markup | 400 | 200 | Medium | Optional |
AutoCAD PDF (Smallest File) | Email transmittals, early-stage sharing | 400 | 200 | Smallest | Optional |
AutoCAD PDF (General Documentation) | General office use, non-critical sharing | Moderate | Moderate | Medium | Optional |
A few things worth knowing about how these presets behave in practice:
High Quality Print is the only preset suited for large-format plotting. At 2400 dpi vector, lines stay crisp at A0 or 36×48 sizes; at 400 dpi, they can look soft when printed large.
Web and Mobile and Smallest File share the same DPI values (400/200) but differ in compression and metadata handling. Web and Mobile is optimized for fast rendering on screen; Smallest File strips more aggressively for size.
None of the default presets enable searchable text out of the box. Most convert text to geometry, which removes searchability entirely. More on that in the next section.
Pro Tip: When sending to a print house, confirm their preferred DPI spec before assuming High Quality Print is enough. Some large-format shops request 600 dpi raster for drawings with embedded photographs or rendered elevations.
What each export option actually controls
This is where most AutoCAD users lose time. The settings inside Export to PDF Options look technical, but each one has a direct, visible effect on your output.
Vector resolution vs raster image quality
Vector resolution (DPI) controls how AutoCAD renders lines, arcs, and geometry. At 2400 dpi, lines are mathematically precise at any print size. At 400 dpi, you may see slight softness on diagonal lines when printed at large scale. For screen-only delivery, 400 dpi is perfectly adequate.
Raster image quality (DPI) only kicks in when AutoCAD has to rasterize something: embedded images, gradient fills, complex transparency, or hatches that can’t be represented as pure vectors. A 600 dpi raster setting keeps those elements sharp at print size; 200 dpi is fine for screen review.
Font handling: capture vs convert to geometry
This setting has the biggest downstream impact of anything in the export dialog. “Convert text to geometry” turns every text string into outlines, which means the PDF looks identical to the drawing but contains no searchable, selectable, or copy-pasteable text. That’s a problem for reviewers, for accessibility, and for anyone using the PDF as a reference in another tool.
The better approach: disable “Convert text to geometry” and enable Capture fonts instead. This embeds TrueType font data in the PDF so text stays selectable. The predefined presets commonly convert text to geometry by default; you have to build a custom PC3 to change that behavior permanently.
Layer information
Including layer information lets recipients toggle layer visibility in PDF viewers and, more usefully, import the PDF as a layered underlay in Revit or another AutoCAD file. The cost is file size: a layered PDF can be significantly larger than a flattened one. For cross-discipline collaboration, that tradeoff is usually worth it. For a simple transmittal to a client, it is not.
Color, monochrome, and grayscale
Color PDFs are larger than monochrome ones. If your drawing uses color-coded layers for internal organization but the output should read as black-and-white, apply a monochrome CTB (color-dependent plot style table) or switch to a monochrome STB. This is one of the most common oversights in student work: the PDF arrives with red, yellow, and green lines that were never meant to be visible in the final document.
Merge control, lineweights, and transparency
Merge control determines how overlapping objects render. “Lines merge” blends overlapping lines; “Lines overwrite” lets the top object cover the one beneath it. For most architectural drawings, “Lines overwrite” matches what you see on screen.
Transparency is the trickiest setting. Any object with transparency applied forces AutoCAD to rasterize the area around it, which inflates file size and can degrade nearby vector geometry. The fix: either increase raster DPI to compensate, or flatten transparencies before export by removing the transparency property from affected objects.
Setting | Effect on output | Effect on file size |
Vector DPI 2400 | Sharp lines at large-format print | Larger |
Raster DPI 600 | Sharp images/fills at print | Larger |
Capture fonts (on) | Searchable, selectable text | Slightly larger |
Convert text to geometry (on) | Non-searchable outlines | Neutral |
Include layer info (on) | Toggleable layers in PDF viewer | Larger |
Monochrome CTB | Black-and-white output | Smaller |
Transparency present | Forces rasterization of affected areas | Larger |
Pro Tip: The Export to PDF Options dialog settings override Page Setup Manager values when conflicts exist. If your output looks different from what your page setup specifies, check whether an Export override is in play.
How to create multi-sheet PDFs using Publish
Publish is the right tool for any drawing set larger than two or three sheets. Here’s the workflow:
Type PUBLISH at the command line or go to Application Menu > Publish.
In the Publish dialog, verify that the sheet list shows the layouts you want. Add or remove layouts using the Add Sheets button or by dragging from the drawing list.
Set the Publish to dropdown to PDF.
Click Publish Options. In the dialog that opens, check Multi-sheet file to combine all selected layouts into a single PDF. If this is unchecked, AutoCAD generates one PDF per layout.
Confirm the preset selection under PDF preset in Publish Options.
Set the output file name and location, then click Publish.
Sheet order in the Publish list controls page order in the final PDF. Drag sheets up or down before publishing to match your drawing index. Naming conventions matter here: AutoCAD uses the layout name as the sheet name in the PDF, so clean layout names (“A1-01 Site Plan” rather than “Layout3”) make the final document much easier to navigate.
For large projects, disable Background Plotting in the Publish Options dialog before running a big batch. Background Plotting adds memory overhead that can cause AutoCAD to stall or crash mid-publish on complex drawing sets. Breaking a 60-sheet set into two 30-sheet batches is faster than restarting a failed publish from scratch.
Pro Tip: Save your Publish sheet list as a DSD (Drawing Set Description) file. Next time you need to publish the same set, load the DSD instead of rebuilding the list manually.
EXPORTPDF vs PLOT: which workflow fits your situation
The distinction between EXPORTPDF and PLOT comes down to one question: do you need repeatable, print-accurate output, or fast digital delivery?
EXPORTPDF advantages:
Faster to access and configure for routine exports
Preset-driven, so consistent results once presets are set up
Good for digital delivery: email, cloud storage, review platforms
The Options button exposes all the fine-grained controls you need for most jobs
PLOT with PC3 advantages:
Full CTB/STB pen assignment support for precise lineweight and color control
Custom paper sizes that match your plotter’s physical media
Plot stamp and plot-to-scale controls that EXPORTPDF doesn’t expose
Required when sending to a wide-format print bureau that expects a specific pen-weight spec
When CTB/STB pen mappings or exact halftone behavior are required, PLOT with a tuned PC3 is the only reliable path. A print house receiving a PDF generated by EXPORTPDF with default pen settings may produce output that doesn’t match your drawing’s intended lineweight hierarchy.
One important note: Export dialog settings override Page Setup Manager values when conflicts exist. For teams with standardized page setups, the safest approach is to lock down page setups and route all production output through PLOT with a named PC3, reserving EXPORTPDF for ad-hoc digital sharing. Consistent architectural drawing setup practices make this much easier to enforce across a team.
Troubleshooting common PDF export problems
Most AutoCAD PDF quality issues trace back to one of five root causes.
Blurry or soft lines at print size. Check vector DPI first. If you exported with Web and Mobile or Smallest File and then printed at A1 or larger, the 400 dpi vector setting is the culprit. Re-export with High Quality Print (2400 dpi) and the lines will sharpen. Also confirm that your drawing isn’t accidentally exporting as a rasterized image: if “Convert to raster” is enabled somewhere in the chain, all geometry gets flattened to pixels.

Missing or substituted fonts. This usually means the PDF was exported with “Convert text to geometry” on, or the font wasn’t embedded. Switch to Capture fonts and disable text-to-geometry conversion in a custom PC3. If the font is a SHX (AutoCAD shape font) rather than a TrueType font, consider converting it to a TrueType equivalent before export, since SHX fonts don’t embed cleanly in PDFs.
Oversized files. Three common causes: layer information is included when it isn’t needed, raster DPI is set to 600 for a screen-only deliverable, or the drawing contains transparency that’s forcing rasterization of large areas. Switch to Web and Mobile or Smallest File for non-print deliverables, reduce raster DPI, and audit the drawing for transparency objects. Well-organized layer standards also help here: unused or redundant layers inflate exported PDFs unnecessarily.
Layers not appearing in the PDF. The “Include layer information” checkbox must be enabled in Export to PDF Options. It’s off by default in most presets. Enable it, re-export, and the layers will appear in the PDF’s layer panel.
Unexpected rasterization around gradients or transparency. AutoCAD rasterizes any area where transparency is applied, even if the surrounding geometry is pure vector. The fix is either to remove transparency from affected objects before export, or to increase raster DPI so the rasterized areas still look sharp at print size. For drawings with extensive gradient fills or rendered hatches, a mixed vector/raster strategy at 600 dpi raster is usually the right call.
Performance crashes during batch publish. Disable Background Plotting and publish in smaller batches. On very large or complex sets, closing other applications before publishing also helps free up memory.
Pro Tip: A quick visual QA check after export takes about 30 seconds: open the PDF, zoom to 200% on a detail with fine linework, and check one text string for selectability. Those two checks catch 95% of quality problems before the file leaves your desk.
S15studio’s recommended workflow for repeatable exports
Here’s the workflow S15studio recommends for architects and technicians who need consistent, professional PDF output across projects.
Recommended presets by use:
Final construction documents for print: AutoCAD PDF (High Quality Print), 2400 dpi vector / 600 dpi raster
Internal review and field tablets: AutoCAD PDF (Web and Mobile), 400 dpi vector / 200 dpi raster
Client transmittals and early-stage sharing: AutoCAD PDF (Smallest File) or a custom low-DPI preset
How to build a custom PC3 for searchable project transmittals:
Open the Plotter Manager (type PLOTTERMANAGER at the command line).
Double-click Add-A-Plotter Wizard and follow the prompts to create a new plotter based on the DWG to PDF driver.
In the plotter properties, open Custom Properties for the PDF driver.
Disable Convert text to geometry and enable Capture fonts.
Set vector DPI to 2400 and raster DPI to 400 (a good balance for transmittals that may also be printed at small format).
Save the PC3 with a descriptive name (e.g., “Studio-Transmittal-Searchable.pc3”) and distribute it to your team.
Repeatable export checklist:
Verify page setup in Page Setup Manager matches the intended output size and orientation.
Choose the correct preset or PC3 for the delivery type (print / review / transmittal).
Check layer information and font capture settings in Export to PDF Options.
Export or publish.
Open the PDF, zoom to a detail, and confirm line sharpness and text selectability.
Pro Tip: Store your studio’s PC3 files in a shared network location and point AutoCAD’s Plotter Configuration Search Path (Options > Files) to that folder. Every team member uses the same configurations automatically, and updates propagate without manual redistribution.
Key Takeaways
Choosing the right AutoCAD PDF preset by end use, combining it with correct font and layer settings, and routing output through the appropriate command (EXPORTPDF or PLOT) eliminates the majority of quality and file-size problems before they happen.
Point | Details |
Match preset to end use | Use High Quality Print (2400/600 dpi) for final print; Web and Mobile or Smallest File for screen and transmittal. |
PLOT/PC3 for print production | Use PLOT with a custom PC3 and CTB/STB when pen assignments or exact paper sizes are required. |
Enable layers and font capture for collaboration | Include layer info and capture fonts when consultants need searchable or underlay-capable PDFs; expect larger files. |
Export overrides Page Setup | Export to PDF Options settings take precedence over Page Setup Manager; lock page setups for repeatable team output. |
S15studio workflow | S15studio’s project-based AutoCAD training covers preset configuration, PC3 setup, and batch publish workflows end to end. |
The setting most architects get wrong
Most PDF export problems in architectural practice aren’t DPI problems. They’re font problems that nobody notices until a consultant opens the PDF and can’t search for a room number, or a reviewer tries to copy a specification note and gets nothing.
The default presets convert text to geometry. That decision made sense years ago when font embedding was unreliable across PDF viewers, but it’s the wrong default for modern practice. A PDF where every text string is an outline is harder to review, inaccessible to screen readers, and useless as a searchable reference. The fix is a single custom PC3 with Capture fonts on and text-to-geometry off. It takes ten minutes to set up and it changes how useful your PDFs are to everyone who receives them.
The other thing worth saying: the EXPORTPDF vs PLOT distinction matters more than most users realize. Architects who learned AutoCAD informally often default to EXPORTPDF for everything, including print-house submissions. That works until it doesn’t: a print bureau that expects specific pen weights will produce output that looks nothing like your drawing if the CTB isn’t applied correctly. Learning when to use PLOT with a tuned PC3 is one of those skills that separates a drafter who produces drawings from one who produces deliverables.
For students and early-career technicians, the fastest way to build this fluency is through structured, project-based practice where you export real drawing sets, not just sample files. The settings only stick when you’ve used them under deadline pressure on something that actually matters.
Build real AutoCAD export fluency with S15studio
Knowing the settings is one thing. Applying them correctly under project pressure, across a full drawing set, with a print deadline tomorrow, is another skill entirely.

S15studio’s AutoCAD mastery course covers PDF export and print workflows as part of a complete, project-based curriculum built specifically for architects, technicians, and BIM professionals. You work through real drawing sets, configure PC3 files, run batch publishes, and troubleshoot the exact quality problems this guide covers. The course includes downloadable templates, PDF notes, and direct trainer support from Autodesk Certified Trainer Steve Fagan, with lifetime access to all materials. No subscription, no recurring fees. One purchase, full access. If you want to go deeper on AutoCAD and Revit together, the complete Revit and AutoCAD training package covers both platforms with the same project-based approach. Start with the course that fits where you are now and build from there.
Useful sources
Predefined PDF Preset Reference — official Autodesk documentation covering DPI values and behavior for all built-in PDF presets, including High Quality Print, Web and Mobile, and Smallest File.
To Export Selected Layouts to a PDF File — Autodesk help page covering the Publish workflow, Multi-sheet file option, layer information guidance, and Background Plotting performance notes.
Save as PDF Dialog Box / Export to PDF Options — reference for the Options button, Export to PDF Options dialog, and how export settings override Page Setup Manager values.
About PDF Driver Custom Properties — covers how predefined presets are stored as PC3 files and how to customize them for team-wide distribution.
Configure PDF output settings — Autodesk Learn tutorial walking through the Export to PDF configuration workflow.
AutoCAD architectural drawing setup guide — S15studio resource on page setup and plotting conventions that underpin repeatable PDF export.
AutoCAD layer standards setup guide — S15studio resource on layer naming and export-ready layer organization for consultant workflows.
Recommended
Comments