
Revit Project Parameters Explained for BIM Professionals


What are Revit project parameters and why do they matter?
Project parameters are user-defined data containers you create and assign to element categories within a single Revit project file. Think of them as custom fields you attach to walls, doors, rooms, sheets, or views so you can schedule, sort, and filter that data inside your project. They are not transferable to another project, cannot appear in tags, and cannot be exported for use across your firm’s project library.
That last point trips up a lot of BIM users. Project parameters are powerful for internal project organization, but they are a dead end for any data that needs to travel outside the file. Here is what they do well:
Assign custom data fields to one or more element categories (walls, doors, rooms, sheets, views)
Drive multi-category and single-category schedules for sorting and filtering
Store text, numbers, materials, URLs, images, and other data types against elements
Appear in the Properties palette or Type Properties dialog under the group you define
Support both Type parameters (shared across all instances of a type) and Instance parameters (unique per element)
What they cannot do is equally important. Project parameters cannot be tagged or exported for use in multiple projects. If you need a parameter to show up in a tag annotation or to carry consistent data across several project files, you need a shared parameter instead.
Understanding Revit parameters at this level is foundational to good BIM practice. The choice you make at the start of a project shapes every schedule, tag, and data export that follows.
How do all the Revit parameter types compare?
Revit gives you five categories of parameters to work with, and each one occupies a distinct role. The four main custom types are project, shared, family, and global parameters. System parameters are built in by Autodesk and cannot be deleted or modified.
Here is a quick breakdown before the comparison table:
Project parameters: Specific to one project file, assigned to element categories, used for scheduling and filtering, not taggable or exportable
Shared parameters: Stored in an external .txt file, usable across multiple projects and families, can be tagged and scheduled
Family parameters: Live inside a single family file, control dimensions and materials internal to that family, not shareable across projects
Global parameters: Project-specific but not assigned to categories; they drive model relationships through equations or values linked to model elements
System parameters: Built into Revit (think “Wall Height” or “Room Area”), always present, cannot be created or deleted
Parameter type | Scope and applicability | Tag and schedule capability | Data sharing/export ability | Modifiability |
Project | Single project file; assigned to element categories, sheets, views | Schedule and filter only; cannot be tagged | Cannot be shared across projects | User-created; fully editable within the project |
Shared | Multiple projects and families via external file | Can be tagged and scheduled | Shared across projects and families | Definition protected by external file; values editable |
Family | Single family file only | Not directly schedulable from project | Not shareable across projects or families | Editable within the family editor |
Global | Single project file; not assigned to categories | Not tagged; can drive dimensions and model relationships | Not exportable | User-created; editable within the project |
System | All projects; built into Revit | Schedulable; some taggable | Read-only; cannot be exported as custom | Cannot be created, deleted, or renamed |
The practical takeaway here is that project parameters and global parameters both live inside one project file, but they serve different purposes. Project parameters attach to element categories and feed schedules. Global parameters sit above the category level and govern model-wide relationships, like keeping all beam offsets consistent when a floor slab moves.

For architects managing quantity calculations in architectural workflows, understanding which parameter type carries which data is the difference between a schedule that exports cleanly and one that dead-ends at the project boundary.
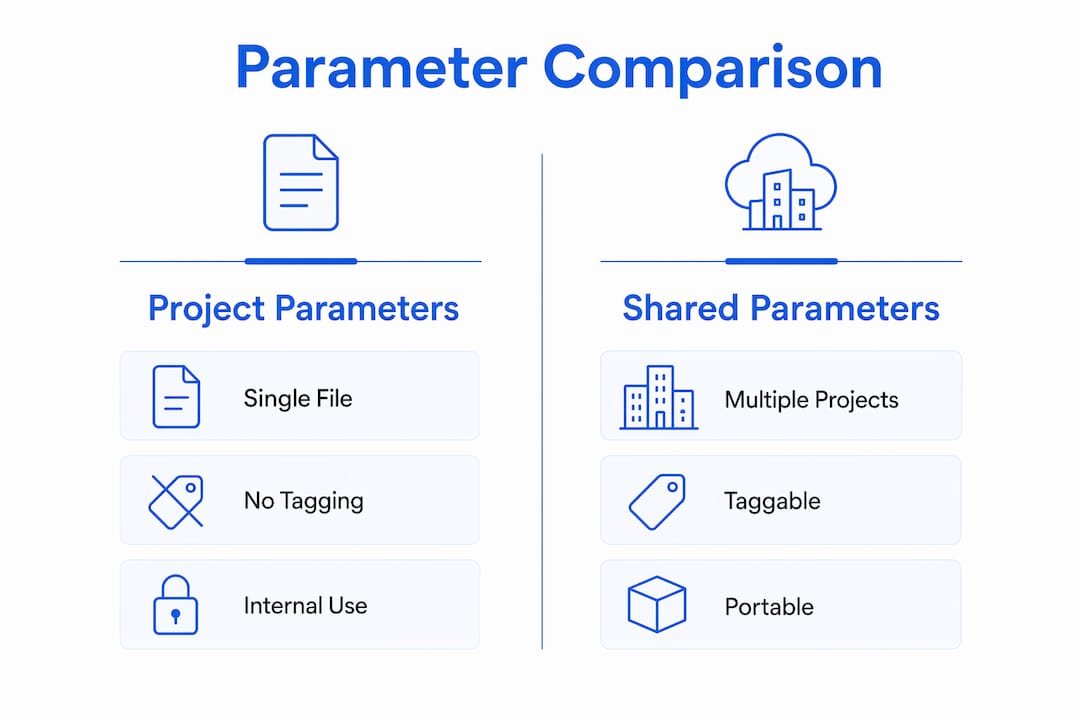
What separates project parameters from shared parameters?
The core difference comes down to portability and tagging. Project parameters stay inside one file. Shared parameters are stored in a separate external file, which means the same parameter definition can be loaded into multiple project files and multiple families, and it can drive tag annotations on your drawings.
That external file structure is also what protects the shared parameter definition from accidental change. Because the definition lives outside the project, Revit treats it as locked, which is why shared parameters can be tagged and scheduled reliably across a firm’s entire project portfolio.

Feature | Project parameters | Shared parameters |
Scope | Single project file | Multiple projects and families |
Stored in | Project file (.rvt) | External shared parameter file (.txt) |
Taggable | No | Yes |
Schedulable | Yes | Yes |
Exportable for reuse | No | Yes |
Definition protected | No | Yes (external file) |
Best for | Internal scheduling, sorting, filtering | Firm-wide data standards, tagging, cross-project reporting |
The workflow impact of getting this wrong is real. Choosing the wrong parameter type early often means rebuilding schedules, re-tagging elements, and re-entering data once you realize a project parameter cannot do what you need. That rework is expensive on a live project.
Pro Tip: Decide upfront whether any parameter will ever need to appear in a tag or be reused in another project. If the answer is yes to either, create a shared parameter from day one. Switching later is painful and sometimes means data loss.
How to create and use project parameters in Revit
Creating a project parameter takes less than two minutes once you know the path. The process is straightforward, but the decisions you make during setup, especially around data type and instance versus type, have long-term consequences for your schedules.
Step-by-step: creating a project parameter
Open your Revit project and go to Manage tab > Project Parameters > Add.
In the Parameter Properties dialog, select Project parameter (not Shared parameter).
Enter a clear, descriptive name. Avoid abbreviations that only make sense to you today.
Set the Discipline (Common, Architecture, Structure, MEP) and Type of Parameter (Text, Integer, Length, Material, URL, etc.).
Choose Instance or Type depending on whether values should vary per element or stay consistent across a type.
Under Categories, check every element category this parameter should apply to. You can assign it to multiple categories at once.
Click OK. The parameter now appears in the Properties palette for any element in those categories.
Assigning parameters to schedules and filters
Once created, your project parameter shows up as an available field when you build a schedule. Go to View > Schedules > Schedule/Quantities, pick your category, and add the parameter as a field. From there, you can sort, group, and filter by it just like any built-in field.
For view filters, navigate to Manage > Filters, create a new filter, and select your project parameter as the filter rule. This is particularly useful for color-coding elements by status, phase, or any custom classification you have defined.
Naming conventions and organization tips
Use a consistent prefix for firm-specific parameters (e.g., “XX_Status”, “XX_Zone”) so they group together in the Properties palette and are easy to identify
Match the data type to the actual data: use Text for labels, Integer for counts, Yes/No for binary flags, and Length or Area for measurable values
Document your parameter names and purposes in a project BIM Execution Plan so the whole team uses them consistently
Use the filter tools in the Project Parameters dialog to search by Parameter Name, Parameter Type, Value Type, or Discipline when managing large parameter lists
Common issues and how to fix them
Parameter not showing in schedule: Check that the parameter is assigned to the same category as the schedule. A parameter assigned to Walls will not appear in a Doors schedule.
Parameter value grayed out: If you have applied a formula with two or more variables, Revit disables direct editing of that parameter. Change the input variables instead.
Values inconsistent across group instances: Check whether the parameter is set to “Values are aligned per group type” or “Values can vary by group instance.” The default aligns values, which may not be what you want for unique identifiers.
Cannot tag the parameter: Project parameters are not taggable by design. If tagging is required, you need to recreate it as a shared parameter.
Expert insights from S15studio on mastering project parameters
Steve Fagan, Autodesk Certified Trainer and founder of S15studio, works with architects and BIM professionals daily on exactly these decisions. A few patterns come up repeatedly in real project environments that go beyond what the Revit documentation covers on its own.
The group instance behavior is one that catches even experienced users off guard. When a project parameter is set to “Values are aligned per group type,” changing the value for one element in a group updates the same element in every instance of that group. For a hospital project where each room group contains a piece of equipment that needs a unique asset ID, that default behavior is wrong. Switching to “Values can vary by group instance” lets each room carry its own value. The catch: if you later switch an existing parameter back from “varies” to “aligned,” Revit applies the value from the first group instance to all others, potentially overwriting data you entered manually.
Formulas add another layer of complexity. A single-variable formula still lets you edit the parameter directly or by changing the variable. But the moment you introduce a second variable, the parameter value becomes read-only. That behavior is intentional, not a bug, but it surprises users who expect to override a calculated value.
From S15studio’s training practice: The most common parameter mistake in architectural projects is not a technical error. It is a planning failure. Teams create project parameters for room data, equipment specs, or phasing status without asking whether that data will ever need to appear in a tag or be reused in the next project. Six months later, they are rebuilding schedules from scratch. The fix is a five-minute conversation at project kickoff about which parameters belong in a shared parameter file and which are genuinely project-specific.
A few more practical points worth keeping in mind:
Data type is permanent. Once you set a parameter as Text, you cannot change it to Integer later without deleting and recreating it. Get the data type right before assigning values.
Multi-category assignment is powerful but requires discipline. Assigning a parameter to 15 categories sounds efficient, but if only 3 categories ever use it, the clutter in the Properties palette slows everyone down.
Project parameters and Revit project information work together. Project Information fields are essentially system-level project parameters. Understanding both helps you avoid duplicating data across the model.
Test parameters in a sandbox file first. Deleting a parameter that already has values assigned to hundreds of elements is irreversible without an undo. Build your parameter schema in a test file before rolling it out to the live model.
The common modeling mistakes that slow down BIM projects almost always trace back to parameter decisions made too quickly at project start. A clear parameter strategy, even a simple one, pays back in schedule accuracy and data reliability throughout the project lifecycle.
Ready to go deeper on Revit parameters?

S15studio’s complete Revit training program covers project parameters, shared parameters, families, and the full BIM workflow in a structured, project-based format built for architecture and design professionals. Every course is developed by Steve Fagan, Autodesk Certified Trainer, and designed around the real decisions you face on live projects, not abstract theory.
Whether you are preparing for Autodesk certification or building a stronger BIM foundation for your practice, S15studio has a course path that fits where you are right now.
Key Takeaways
Project parameters are the right tool for internal project data management, but shared parameters are the only choice when tagging or cross-project reuse is required.
Point | Details |
Project parameters are project-specific | They live in one .rvt file, cannot be tagged, and cannot be exported or reused across projects. |
Four custom parameter types exist | Project, shared, family, and global parameters each serve a distinct scope and workflow purpose. |
Shared parameters enable tagging | Because their definition is stored in an external file, shared parameters can drive tag annotations and schedules across multiple projects. |
Group instance behavior requires a deliberate choice | The “Values can vary by group instance” setting must be selected manually; the default aligns values across all group instances. |
Data type is set permanently | Choose Text, Integer, Length, or another type carefully before assigning values, since changing it later requires deleting and recreating the parameter. |
Recommended
Comments