
Architects: Revit Title Block in 6 Steps with Ready .rfa Templates


A Revit title block is a 2D family file (.rfa) that acts as the border and label system wrapped around every sheet in your project. It holds your firm’s logo, project data, and revision history through parametric labels instead of static text. If you need one fast, download a ready-made .rfa or open File → New → Title Block inside Revit to build your own. Autodesk’s own documentation and several downloadable template packs cover both routes.
TL;DR:
Use labels instead of static text for project data to ensure automatic updates and avoid manual re-editing on every sheet.
Verify that imported or built title blocks include a revision schedule and are sized correctly to match project paper sizes to prevent cropping.
Always reload modified family files into the project after editing to ensure changes propagate across all sheets using that title block.
Build border lines first and lock them before placing labels to avoid misalignment and tedious adjustments later.
Prioritize setting a printable boundary and correctly binding shared parameters over aesthetic details to prevent layout issues and rework.
Table of Contents
Where to Find Downloadable Revit Title Block Templates
Free libraries scattered across architecture forums and firm blogs offer the fastest starting point, though quality varies wildly. Some packs give you a single A1 sheet with static text fields; others hand you a full family with parametric labels, a working revision schedule, and logo placeholders already wired up. Autodesk Seek and manufacturer-hosted BIM libraries tend to be more reliable than random forum attachments, but even those need a once-over before you trust them on a live project.
You’ll typically encounter two file types: a finished .rfa ready to drop into a project, or a .rft (family template) meant to be customized from a blank size before saving as .rfa. Sizes generally follow ISO A-series (A0 through A4) for metric offices or ANSI/Arch sizes for U.S.-based firms, and most packs include both portrait and landscape variants.
Before loading anything into a live project, run through this checklist:
Confirm the license permits commercial use, not just personal or educational projects.
Check whether the template is metric or imperial. Mixing the two mid-project creates scaling headaches.
Open the family and verify fields are built as Labels, not static text boxes pretending to be dynamic.
Look for a built-in revision schedule. Its absence means you’ll be adding one manually later.
How Do You Create a New Title Block in Revit?
Building a title block from scratch takes less time than most students expect, once you know the sequence. Here’s the practical version:
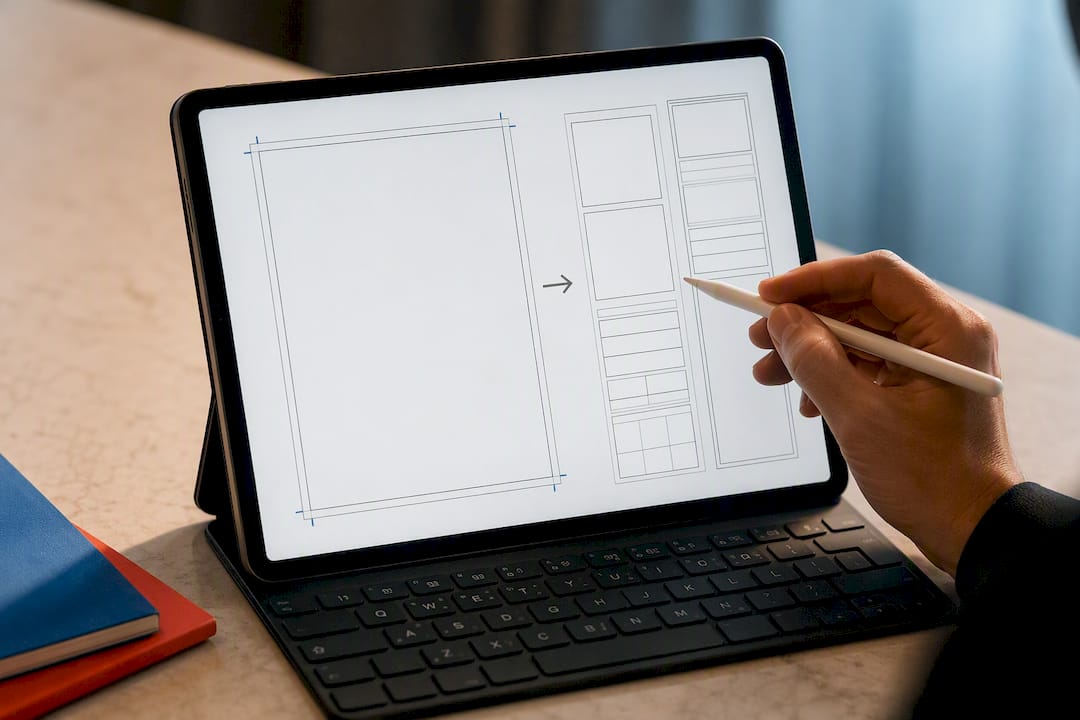
Go to File → New → Title Block, then choose a predefined size or select New Size.rft if none of the standard options match your paper size.
Draw border lines to establish the printable area and separate zones for the drawing, the title block, and any revision table.
Use the Label tool to add project and sheet fields (project name, sheet number, scale, drawn by) rather than typing static text.
Insert your firm logo with the Image tool, keeping it inside the border lines you just drew.
Save the family as an .rfa file, then use Load into Project to bring it into your working file.
Create a new sheet and assign the title block through the Type Selector to confirm everything displays correctly.
Autodesk’s own guidance on creating a title block walks through this same sequence, and it’s worth a read before your first attempt if you’ve never built a family from a blank template.
Pro Tip: Build your border lines first and lock them before placing labels. Architects who add labels before finalizing the border often end up nudging text boxes one pixel at a time for an hour.
How Do You Modify an Existing Title Block?
Most firms don’t build title blocks from zero. They inherit one, tweak it, and pass it down. To edit an existing family, open it through the Project Browser under Families → Annotation Symbols, or go directly through File → Open → Family if you’re working from a saved .rfa outside the project.
Once you’re inside the Family Editor, the work is mostly about telling labels apart from static text. Autodesk’s instructions for modifying title blocks confirm that edits made here only take effect in the project after you reload the family. Practical steps to follow:
Distinguish labels (which pull live project data) from static text (which never updates).
Rotate text or adjust geometry to fit new branding without breaking existing label bindings.
Create shared parameters for any field you want available across multiple projects, then bind them through Labels rather than hardcoding values.
Save the family, then use Load into Project so every sheet using that title block updates at once.
Skipping the reload step is the single most common mistake. Your edits sit safely in the family file while your sheets keep showing the old version.
How Do You Swap or Remove a Title Block on a Sheet?
Swapping a title block doesn’t require deleting anything from your project. Select the sheet in the Project Browser, then use the Type Selector in the Properties palette to pick a different title block family type already loaded into the project. Autodesk confirms this is the correct method for changing the title block used on a sheet, and it works instantly across a single sheet.
For firm-wide changes, right-click one instance and choose Select All Instances → In Project to change every sheet using that title block simultaneously. A few notes worth keeping in mind:
To retire a sheet layout entirely, either switch its type to a blank placeholder family or delete the sheet outright.
Always reload any modified family after editing, or the swap won’t propagate to sheets already placed.
Test a swap on one sheet before applying it across dozens. Mismatched paper sizes between old and new title blocks cause unexpected cropping.
Best Practices for Labels, Logos, Revisions, and Printable Boundaries
A title block that looks right on screen can still print wrong. Getting this right up front saves you from reissuing drawings later.
Use Labels instead of static text wherever data changes between sheets or projects. Autodesk’s own family-editing guidance is explicit that labels pull live project and sheet data, while static text has to be edited by hand on every sheet, every time.
Build a revision schedule directly into the title block family so revision tracking updates automatically rather than requiring a manual note on every sheet.
Keep logos and images inside the printable boundary. Anything placed outside those border lines gets cropped on PDF export or print, which is one of the more embarrassing errors to catch after issuing a drawing set.
Use shared parameters for fields that must stay consistent across projects, and confirm they’re bound to the correct category (Sheets versus Project Information) so they surface in the right Properties palette.
Test-export to PDF at full scale before finalizing any new title block. Screen preview and actual print output don’t always match.
Pro Tip: If your logo looks slightly blurry once exported, the source image resolution is almost always the problem, not Revit’s rendering. Re-import at a higher resolution rather than scaling up the existing placement.
When Should You Import a Legacy Title Block vs. Rebuild It?
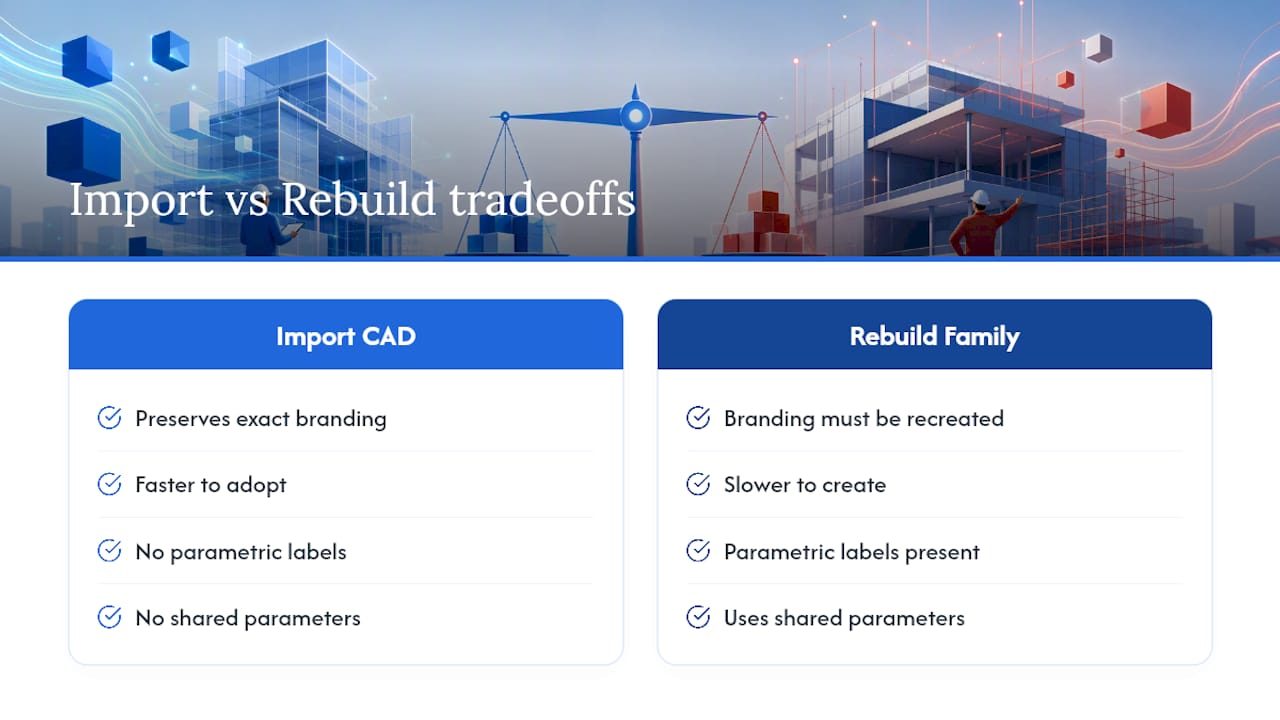
Firms migrating from AutoCAD often ask whether to bring an old CAD title block straight into Revit or start over. The honest answer depends on what you’re protecting. Import the legacy CAD file when preserving exact branding matters more than speed, since imported CAD geometry doesn’t carry parametric labels or shared parameters. Rebuild as a native Revit family whenever you want real BIM benefits: automatic revision tracking, consistent fields across sheets, and labels that update themselves.
For firms enforcing sheet standards across multiple teams, a short governance step matters more than the family itself. A brief governance workshop around family loading and revision control catches mismatched fields before they reach a client set. Most rework at this stage traces back to two things: geometry placed outside the printable boundary, or a shared parameter bound to the wrong category. A sheet setup checklist catches both before they cost you a reissue.
What the Research Actually Supports
Most guides treat title blocks as a one-time setup task. That framing undersells the problem. A title block is document control infrastructure, not decoration, and firms that treat it as an afterthought pay for it every time a project scales past a handful of sheets.
The conventional advice, build it once and move on, ignores how often title blocks get inherited, edited by three different people over two years, and eventually break in ways nobody notices until a client-facing PDF prints with a cropped logo. The fix isn’t more caution. It’s fewer static text fields and more shared parameters bound correctly the first time.
If you’re prioritizing anything, prioritize the printable boundary check and the label-versus-static-text distinction before you touch logos or colors. Everything else is cosmetic. Get the data structure right, and the visual polish is trivial to adjust later. Get it wrong, and you’ll be fixing the same cropped logo on sheet forty-seven six months from now.
— Steve
Get Your Title Blocks Right the First Time
S15studio built its training around exactly this kind of practical detail. Its Complete Revit and AutoCAD Training walks through family creation, shared parameters, and sheet setup as part of a full project-based curriculum, so you’re not piecing together forum posts to figure out why your labels won’t bind correctly.

If your title block problems are really a teamwork problem, mismatched fields across a five-person team, sheets that update inconsistently, the Revit Worksharing course covers the file governance side directly. And if a Revit title block was your first stop but you’re weighing a broader switch from CAD, the training hub at S15studio is the place to start browsing course options and downloadable resources.
Where to Learn More
Autodesk’s official Title Blocks documentation for authoritative setup guidance.
S15studio’s Revit Sheet Setup Checklist for a practical field-by-field review.
Sources
Recommended
Comments