
Stop Fixing Visibility: Revit View Templates in 3 Practical Steps


A Revit view template is a saved set of view properties (scale, discipline, detail level, visibility and graphics, and filters) that you apply across multiple views to force consistent output. Get one built correctly and you stop fixing the same visibility override forty times per project. This guide covers the three creation methods, filter setup, how to move templates between projects, and where to find safe downloadable packs.
TL;DR:
Building templates from detailed views ensures all necessary filters and settings are included without missing critical category overrides.
Applying templates saves time by copying settings once, while assigning them ensures ongoing updates propagate to all linked views.
Sharing templates between projects requires careful version and unit matching to prevent scale and compatibility issues.
Revit view filters should be prioritized correctly and limited in number to optimize project performance and reduce lag.
Downloadable template packs are useful but require verifying version compatibility, units, and included view types before integration into active projects.
Table of Contents
What Do Revit View Templates Actually Control?
A view template locks down a specific bundle of settings so every view that uses it looks the same. That includes detail level, scale, discipline, model graphics style, and filters, plus dozens of category overrides in the Visibility/Graphics dialog. When you build or edit a template, the Include column next to each row lets you decide whether that property is locked by the template or left free for the individual view to control.
The most common mismatch happens between construction documents and presentation graphics. A construction set needs consistent line weights, dimension styles, and annotation crop visibility, while a presentation template usually cares more about shadows, sketchy lines, or a rendered visual style borrowed from Graphic Display Options. Trying to force one template to do both jobs is where most template libraries fall apart.
Core properties every template can carry:
View scale and scale value for detail views
Discipline (architectural, structural, coordination)
Detail level (coarse, medium, fine)
Model graphics style and shadows
Visibility/graphics overrides by category
Applied view filters and their overrides
Autodesk’s own reference on view templates lays out the full property list if you want the authoritative version rather than a summary.
How Do You Create a View Template in Revit?
There are three reliable ways to build one, and each fits a different starting point. Pick based on whether you already have a template close to what you need, a view that already looks right, or a display style you just dialed in manually.
Duplicate an existing template. Go to View tab → Graphics panel → View Templates → Manage View Templates. Select a template close to what you want, click Duplicate, rename it, then adjust the Include checkboxes and properties in the right-hand panel.
Create a template from the current view. Open the view that already has the settings you want, then go to View tab → Graphics panel → View Templates → Create Template from Current View. Revit builds a new template using that view’s exact current settings, which you can then rename and refine.
Save from Graphic Display Options. Open the Visual Style controls at the bottom of the view, click Graphic Display Options, adjust shading, shadows, sketchy lines, or depth cueing, then use Save as View Template (or Load from View Template) directly from that dialog.
Whichever route you use, confirm the view type matches your intent before saving. A template built from a floor plan won’t carry over cleanly to a section view, since some properties only exist for certain view types.
Pro Tip: Build your template from the messiest, most detailed view in the set first. It’s easier to strip unwanted overrides out of a template than to discover halfway through a project that your “clean” template is missing a filter everyone needs.
What’s the Difference Between Applying and Assigning a Template?
These two actions look similar in the interface but behave very differently once your project grows.
Apply copies the template’s settings into the view one time. Later changes to that template do not touch the view again.
Assign links the view to the template permanently. Every future edit to that template automatically propagates to every view assigned to it.
To assign a template, open View Templates → Manage View Templates, or use the View Properties dialog and set View Template to the template name. The view then follows that template until you change or remove the assignment.
For quick, one-off visual checks without breaking the assignment, enable Temporary View Properties from the View Control Bar. Revit shows a distinctive purple border around the view to flag that it’s temporarily off-template, and you can restore the original settings with one click.
Pro Tip: If a teammate keeps asking why their view “reverted,” check whether they used Temporary View Properties and forgot it resets on its own, or forgot it’s still assigned to a template that just got updated.
How Do Revit View Filters Work Inside Templates?
Revit view filters let you target elements by category and parameter value, then apply automatic graphic overrides, and they become far more useful once they live inside a template rather than a single view. Build a filter under View tab → Graphics panel → Filters, choose the categories it applies to, then set parameter rules such as “Fire Rating equals 2 HR” or “Phase equals Demolition.”
A few things trip people up:
You can stack multiple filters on one view, but the order in the filters list determines priority, with the top filter winning any conflicting override.
Each filter needs to be individually enabled in the view using the checkbox next to it, separate from whether it’s simply listed.
Common examples include highlighting fire-rated walls in red, graying out demolition elements, or dimming linked-model geometry so it doesn’t compete visually with the active model.
Once you build a filter that works, add it to a template rather than applying it view by view. That’s the difference between a filter you configure once and a filter you configure fifty times.
How Do You Transfer and Share Templates Between Projects?
The fastest way to move templates between files is Transfer Project Standards, found on the Manage tab. Open the target project, run the command, choose the source file, and check the View Templates box (plus Filters, since templates reference them). Revit copies both into the current project in one pass.
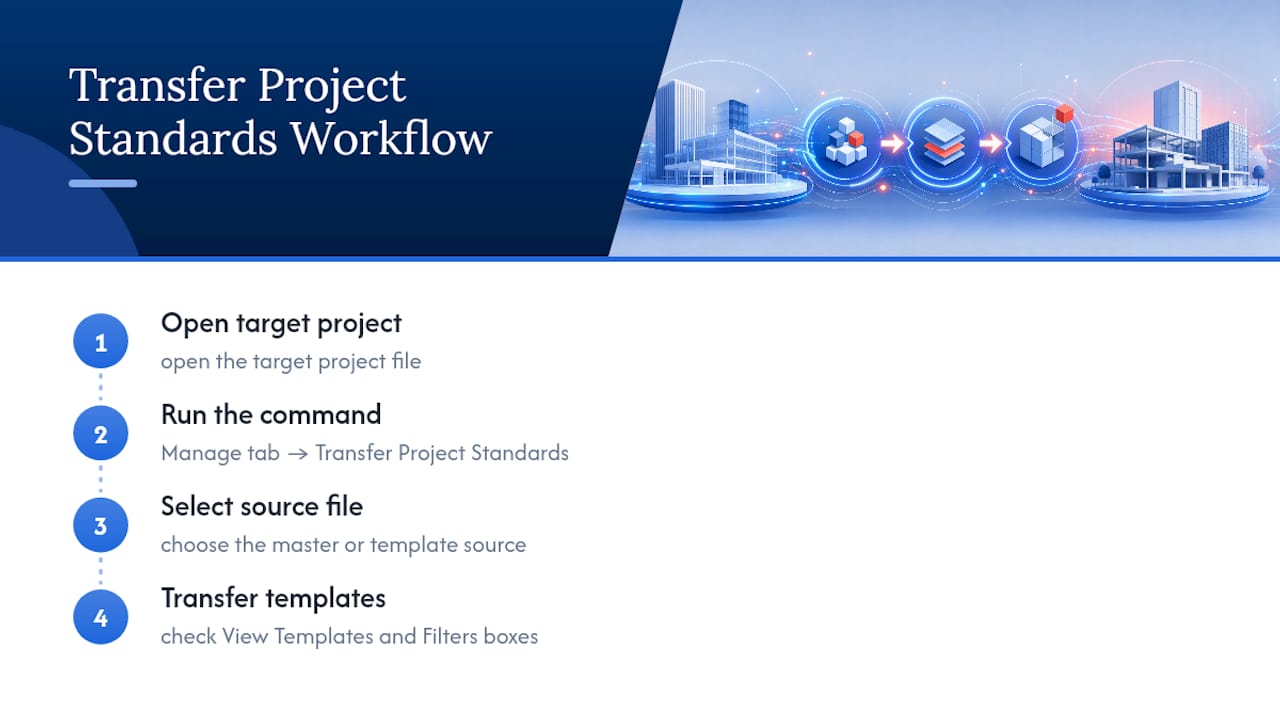
Firms that keep consistency across dozens of active projects typically maintain a master project or template file holding vetted, approved templates, then import from that master into new projects on a regular cycle rather than editing live files directly. Watch for two failure points: mismatched Revit versions between source and target files, and unit mismatches (metric versus imperial) that make scale values look correct in one file and wrong in another.
What Are the Best Practices for Managing View Templates?
Plan your view types before you build a single template by referencing a sample construction project planning and scheduling plan. Decide what construction documentation, coordination, and presentation views actually need to look like, then build a template for each use case rather than one template trying to serve three purposes.
Keep working templates lightweight. Heavy filters, detailed line-weight overrides, and complex visibility settings belong in sheet templates meant for final output, not in the templates modelers use every day while roughing in walls and floors. Loading every view down with the same graphic weight as a final sheet is one of the most common reasons Revit projects start feeling sluggish partway through.
A few naming and version habits pay off fast:
Prefix template names by discipline or use case (e.g., “ARCH_Construction_Plan”, “ARCH_Presentation_Section”).
Version or date-stamp master templates so teams know which one is current.
Assign templates by view type where possible, so new views automatically inherit the right template instead of relying on someone remembering to apply one.
Limit the number of complex, parameter-heavy filters running simultaneously across a large project; each one adds a small calculation cost every time the view regenerates.
Pro Tip: If a large project starts lagging on view switches, audit your filters first. A dozen rule-based filters running on every plan view is a common, overlooked drag on performance.
Where Can You Find Downloadable View Template Packs?
Template packs show up in a few reliable places: Autodesk’s own sample content, architecture resource sites, and community marketplaces that publish downloadable template collections built for specific presentation styles.
Before importing any pack into a live project, run through a short checklist:
Confirm the Revit version matches yours, since templates from a newer version may not open cleanly in an older file.
Check units (metric versus imperial) so scale and dimension settings translate correctly.
Review which view types and filters are included, and whether any reference linked-model categories you don’t use.
Check the license or attribution terms if the pack comes from a paid marketplace.
Import into a test or copy of your project first, apply the template to one view, and confirm it behaves as expected before rolling it out firm-wide.
Should You Build Templates In-House or Buy a Pack?
Building your own templates makes sense the moment your firm has repeatable standards worth protecting. A custom template encodes decisions your office already made about line weights, annotation styles, and discipline workflows, and it stays useful project after project. A purchased pack earns its place differently. It’s faster for a one-off presentation deadline or for a student or new hire still learning what a well-built template even looks like.
The rollout problem is rarely the template itself. It’s getting a whole team to apply it correctly, understand Include settings, and stop overriding it view by view. That’s a training gap, not a template gap, and it’s usually the difference between a template library that gets used and one that gets ignored after week one.
— Steve
Learn View Templates the Right Way With S15studio
S15studio gets you building and assigning view templates correctly in hours, not through months of trial and error on a live project. The Introduction to Revit course walks beginners through view settings, filters, and template basics from the ground up, while the Beginner to Intermediate course covers the workflow habits that keep a template library consistent across a whole office. If you’re preparing for certification, the Revit and AutoCAD training package includes ACU exam prep alongside downloadable resources you can reuse on real projects.
Courses typically provide access to materials and trainer support, helping you check whether your template setup matches current standards. Preview the sample lessons and sign up through the course library to get started.
FAQ
How Do I View Templates in Revit?
Open the View tab, go to the Graphics panel, and click View Templates → Manage View Templates to see the full list, or check the View Template field in a view’s Properties panel to see which one is currently assigned.
How Do I Create a View Template From an Existing View?
Open the view with the settings you want, then go to View tab → Graphics panel → View Templates → Create Template from Current View, and Revit builds a new template matching that view’s exact current settings.
How Do I Change the View Template Applied to a View?
Select the view, open its Properties panel, and change the value in the View Template field. This reassigns the view to a different template immediately.
Where Can I Find Revit View Templates to Download?
Template packs appear on architecture resource sites, Autodesk sample content, and community marketplaces, but always check the Revit version and units before importing one into a live project.
Why Isn’t My View Template Applying Correctly?
The most common cause is a property with its Include checkbox unchecked in the template, or a Temporary View Properties override still active on the view, which blocks the assigned template until it’s reset.
Recommended
Comments