
Trainer Backed Revit Room Tags: Tag Plans in Under a Minute


Tag rooms in Revit using Tag on Placement while creating the room, or select Annotate > Tag by Category (shortcut TG) on rooms already placed. To mass-annotate a view, run Annotate > Tag > Tag All Not Tagged. If tags refuse to appear, check the view template’s Model Categories, confirm the room is bounded correctly, verify the view range matches the room’s level, and for linked models, check phase mapping.
TL;DR:
Tag all untagged rooms in a view using the Tag All Not Tagged command to save time on large projects, ensuring linked models and view templates are properly configured.
Verify that view templates do not override room and tag visibility, and confirm room bounding elements are correctly placed with appropriate phase mapping for linked files.
Build custom room tag families with shared parameters for project-specific data, and lock tag types to view templates to prevent inconsistencies during documentation.
Remember that room tags are 2D annotations linked to 3D room elements, and a room can exist without a tag, so troubleshooting should start with confirming the room’s presence.
Use View Template and workset checks to troubleshoot missing tags, and adopt bulk tagging practices early, supported by proper discipline and clear labeling standards.
Table of Contents
How Do I Tag Rooms in Revit Step by Step?
Placing a room and tagging it are two separate actions, even though Revit lets you do both in one click. Understanding that distinction saves you from a lot of confusion later, especially once you start troubleshooting missing tags.
Here’s the actual workflow:
Go to the Architecture tab and click Room.
Before you click to place the room, look at the Options Bar. Make sure Tag on Placement is checked if you want the tag to appear automatically.
Click inside a bounded space to place the room. Revit generates the room and, if Tag on Placement was active, drops a tag at the same time.
If you skipped that option, or you’re tagging a room that already exists, switch to Annotate > Tag by Category and click on the room. This is the same command whether you’re tagging one room or working through a floor plan one space at a time.
Once the tag is placed, select it to adjust orientation, leader visibility, and tag type from the Type Selector and Properties palette.
The Tag by Category tool sits on the Annotate tab’s Tag panel and works the same way for rooms, doors, walls, and most other tagged categories, so the muscle memory transfers.
Tag type controls the layout template, which parameters display, and text formatting. Tag instance properties control things specific to that one placement: leader on or off, leader length, and rotation. Change the type when you want every tag using it to update at once. Change the instance when you’re fixing one crowded corner.
A quick example: you place a room in a small office suite, Tag on Placement drops a tag dead center, but it overlaps a furniture block in your view. Select the tag, enable Leader, and drag the tag body clear of the obstruction. The leader line keeps it visually tied to the room without you having to move the room itself.
One thing that trips up almost every new user: tags are annotative elements that live in a single view. Tag a room in your floor plan and it will not automatically appear in a ceiling plan, a different level’s plan, or a sheet built from a duplicated view. Each view needs its own tagging pass, or you need Tag All Not Tagged run separately in each one.
Pro Tip: Set your preferred room tag type as the project default before you start placing rooms. Go to the Room tool, click the small arrow in the Tag panel, and set the default tag family so you’re not manually swapping tag types after every placement.
Can You Tag All Rooms at Once in Revit?
Yes, and it’s the command every production team should be using instead of clicking through rooms one by one. Tag All Not Tagged scans the current view and drops tags on every untagged instance of the categories you select, rooms included.
The workflow that actually works in practice:
Place all your rooms first, using the Room tool without worrying about tags yet.
Once the floor plan geometry is settled, switch to Annotate > Tag > Tag All Not Tagged.
In the dialog, check Rooms in the category list and pick which room tag type to apply.
Decide whether to include linked files. Some Revit versions expose this as a checkbox in the same dialog; if rooms live in a linked model, this setting determines whether they get swept up in the same pass.
Click OK. Revit tags every room in the view that doesn’t already have one.
This pairs well with Place Rooms Automatically, which generates rooms for every enclosed space Revit detects on a level. Run that first, then follow with Tag All Not Tagged, and you can go from a bare floor plan to a fully tagged one in under a minute on a straightforward project.
Tag All fails or produces partial results for a few predictable reasons. The view’s scope box might be excluding part of the plan. A linked file’s rooms might not be included because the checkbox was left unchecked. Or a view template locked to different visibility settings is filtering rooms out before the command even runs. Each of those is worth ruling out before you assume the tool is broken.
If you’re managing tagging across a firm rather than a single project, dedicated add-ins can batch this across sheets or automate tag placement rules. Before adopting one, confirm it’s compatible with your specific Revit version and available in your region. Not every add-in ships for every country or every release cycle, and a mismatch there causes more headaches than it solves.
What’s the Difference Between a Room and a Room Tag?
This distinction explains most of the confusion people run into with tagging, so it’s worth being precise about it. A room is a 3D model element, invisible geometry that computes area, volume, and perimeter based on the walls and other elements around it. A room tag is a 2D annotation that reports what the room element already knows, its name, number, computed area, and any other parameter you’ve exposed on the tag family.
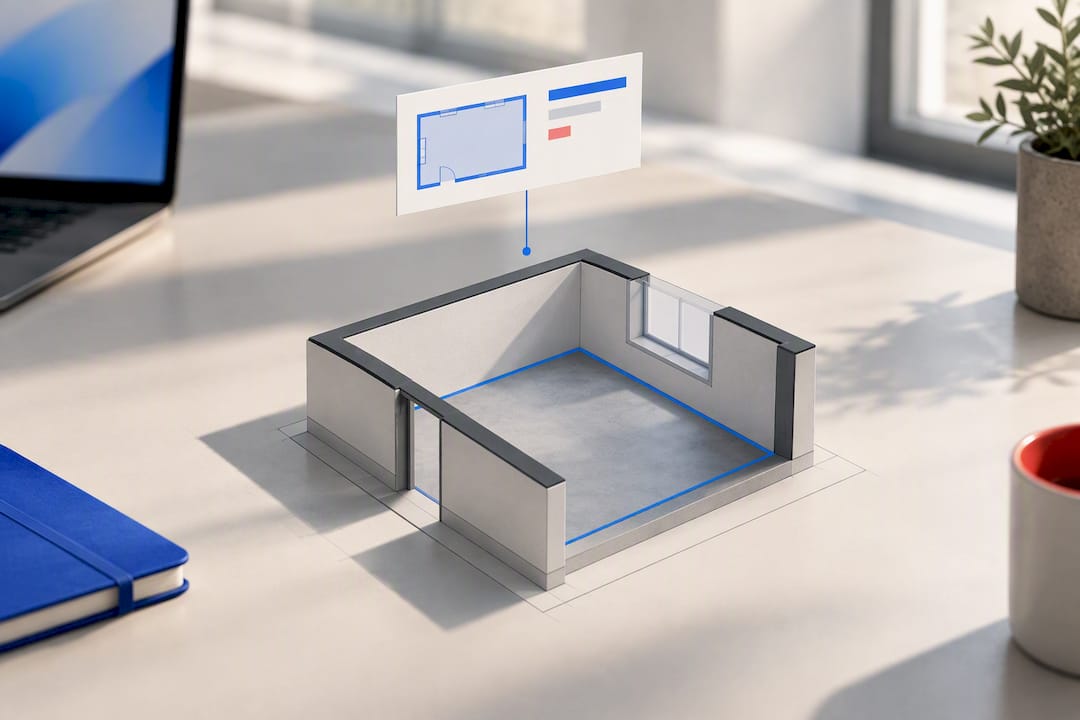
A room can exist perfectly well with no tag at all. It still calculates area, still shows up in schedules, still participates in room-based color fills. A tag, on the other hand, has no independent existence. Delete the room and the tag either disappears or throws an error, depending on your Revit version.
That relationship matters when you’re diagnosing a missing tag. If a tag isn’t showing up, the first question is whether the room itself exists and is placed correctly. Only after confirming the room is there does it make sense to dig into tag visibility settings. Teams that treat tags as the primary object, rather than a readout of the room underneath, waste time debugging the wrong layer of the problem.
For readers newer to Revit’s category model generally, the distinction between model elements and annotation runs through the whole program, not just rooms. Our guide to getting started with Revit covers that model/annotation split in more depth if you want the foundational version of this concept.
How Do You Build a Custom Room Tag Family?
Standard room tags cover the basics, name, number, and area, but most firms eventually need something more specific: a tag that also shows occupancy load, department code, or finish schedule reference. Building that means editing the tag family itself.
Open a new family from Annotations > Metric Room Tag.rfa (or the imperial equivalent, depending on your template).
Add label fields using the Label tool, positioning each field where you want it to read in the finished tag.
Create shared parameters for any custom data point you need, department, occupancy classification, finish code, whatever your project standard calls for. Shared parameters, unlike family parameters, can be pulled into schedules and tags across the whole project.
Load the finished family back into your project, then add matching Project Parameters under the Rooms category so the values actually populate.
Repeat the process for each distinct tag purpose. A programming tag showing department and area looks different from a finish-schedule tag showing floor and wall finish codes, and there’s no reason to cram both onto one crowded label.
Once you’ve built two or three tag types, lock each one to a specific view template so drafters can’t swap tag types ad hoc partway through a set. That single habit prevents more inconsistency than almost any other QA step on a documentation team, according to a Revit tagging workflow guide that walks through the same family-editing process in more detail.
Pro Tip: Give tag backgrounds an opaque fill rather than transparent. On dense floor plans with furniture and equipment layered underneath, a transparent tag background turns into an unreadable mess the moment you print to PDF.
Instance properties still apply here, leader visibility and rotation stay per-placement even on a custom family, but the label content, formatting, and included parameters are locked at the type level once you’ve built the family the way your project standard requires.
Why Are My Room Tags Not Showing Up?
Missing room tags almost always trace back to one of five causes, and working through them in order saves time compared to guessing randomly.
View template overriding visibility. Go to View > Manage View Templates, or press VG for Visibility/Graphics directly, and check Model Categories for Rooms (Interior Fill, Reference) and the Room Tags annotation category. A view template locking rooms off is the single most common cause of the “rooms are not currently visible in this view” error.
Closed or hidden worksets. If rooms and tags live on a workset that’s closed or hidden in the current view, they won’t render even though they exist in the model. Check Collaborate > Worksets and confirm visibility.
View range mismatch. Confirm the view’s associated level matches the level the room was placed on. A room placed on Level 2 won’t show in a Level 1 plan’s view range, no matter how correctly it was tagged.
Non-bounding elements. Rooms need room-bounding elements around them, typically walls, floors, roofs, ceilings, and columns, to compute area correctly. If a wall’s Room Bounding parameter got switched off, or there’s a gap in the enclosure, add room separation lines to close it.
Linked model phase mismatches. When tagging rooms hosted in a linked file, verify Include elements in linked files is checked and that phase mapping between host and link lines up. Autodesk Support documents this specifically: a room belonging to a different phase in the link than the phase active in your host view simply won’t be available to tag, even with every visibility setting correct.
If a tag places, then vanishes the moment you switch views, that’s a strong signal the problem is template-driven rather than model-driven. Create a fresh view with no template applied and try tagging there. If the tag holds, work backward through the template’s overrides until you find the setting doing the hiding.
Common Revit modeling mistakes around levels and room-bounding show up constantly in QA reviews, and they’re worth reading through if visibility issues keep recurring across a project rather than in one isolated view.
What Are the Best Practices for Managing Room Data?
Reliable room tags start upstream of the tagging command itself, with how you set up units, keys, and QA habits at the start of a project.
Set project units before you tag anything. Go to Manage > Project Units and lock in your area rounding and display format. Changing this after tags are placed forces a review of every schedule and tag that references area.
Use Room Key Schedules to push data in bulk. Rather than editing department, finish, or occupancy fields room by room, assign a key value and let the key schedule populate dozens of rooms at once. This is faster and far less error-prone than manual tag edits.
Build a dedicated Room QA view. Apply a color scheme keyed to department or occupancy classification and scan it before every issue. Mismatched colors jump out immediately in a way that scrolling a schedule doesn’t.
Run Tag All Not Tagged as a release checklist item, not a one-time setup step. New rooms get added throughout a project’s life, and this command should be part of your standard pre-issue routine, alongside locking tag types to view templates so nobody swaps them casually mid-project.
Treat schedules as the control panel, not the tag itself. Teach your team to make bulk edits through Room Schedules rather than clicking through tags one at a time. It’s faster, and it leaves an auditable trail of what changed.
A concise best-practices rundown from the Revit tagging community covers this same sequence and is worth bookmarking as a quick reference.
Pro Tip: Add a “Room QA” step to your sheet setup checklist so nobody issues a set without running the color-scheme review first. It catches more errors than any single visibility fix on this list.
Trainer’s Checklist: Teaching Room Tags in the Classroom
Watching students hit the same wall repeatedly tells you where the workflow needs reinforcing. The demo order that sticks best: place a room, show Tag on Placement working automatically, then undo it and show Tag by Category doing the same job manually. Students grasp the model/annotation split faster when they see both paths side by side rather than just one.
The three pitfalls that come up in nearly every cohort: a view template silently hiding tags, a room placed on the wrong level so it falls outside the view range, and a wall someone accidentally set to non-room-bounding. Testing student files for these three issues before touching anything else resolves most support requests in minutes.
The habit worth drilling early: key schedules for bulk data, locked tag types tied to view templates, and a Room QA checkpoint before any sheet goes out. Teams that adopt those three habits early stop generating the kind of forum threads that fill up Autodesk’s support boards.
When Should You Automate Tagging Versus Do It by Hand?
Automation earns its keep on repetitive documentation, large floor plates, standard department layouts, anything where Tag All Not Tagged and Place Rooms Automatically can do in seconds what would take an afternoon by hand, assisted by modern interdisciplinary workflows explained in The Future of Building Design: DSM Modelling Explained. But automation without discipline just moves errors downstream faster. A locked tag type and a clean view template matter more once you’re relying on bulk commands.
Manual tagging still wins on bespoke spaces, unusual room shapes, or anywhere a tag carries a note that shouldn’t be templated. The real skill isn’t picking one approach. It’s knowing which rooms deserve which treatment, and that judgment comes from repetition and proper training rather than trial and error on live projects.
— Steve
Learn Room Tagging and Documentation Workflows With S15studio
Everything covered here, placement, bulk tagging, custom families, and troubleshooting, gets a lot easier once you’ve practiced it on a real project rather than a one-off tutorial. That’s the gap S15studio’s courses are built to close: project-based training instead of disconnected feature walkthroughs.

The Revit Course Only program takes you from room placement through custom tag families and documentation standards using the same workflows covered in this guide. If your projects run on shared models across a team, the Worksharing Course (€15 one-off) covers the collaboration and linked-model settings that directly affect whether tagged rooms in a link show up correctly. And for firms building out custom tag families with shared parameters at scale, the Advanced Course goes deeper into family editing and project parameter setup than any single article can.
Every course includes access to materials and trainer support, so questions that come up mid-project don’t sit unanswered. Start with the Revit training page to see which course matches where your skills stand today.
Where to Verify These Room Tagging Procedures
For the official mechanics behind everything covered above, Autodesk’s own documentation remains the most reliable reference: the tagging procedures guide, the room-bounding elements reference, and the Support article on linked room tagging failures each cover edge cases beyond what fits in a single guide.
Sources
FAQ
How Do I Tag Rooms in Revit?
Use Tag on Placement while creating a room with the Room tool, or select Annotate > Tag by Category on an existing room. Both methods place the same annotation element, just at different points in your workflow.
Why Can’t I See Room Tags in Revit?
The most common cause is a view template overriding your room and tag visibility settings, followed by view range mismatches and non-room-bounding walls. Check Visibility/Graphics (VG) for the Rooms and Room Tags categories first, since that resolves the majority of cases according to Autodesk’s own troubleshooting guide.
Is There a Way to Tag All Rooms at Once in Revit?
Yes. Run Annotate > Tag > Tag All Not Tagged, check Rooms in the category list, and select your preferred tag type. This mass-tags every untagged room in the current view in a single pass.
How Do I Add a Tag on Revit?
Select Annotate > Tag by Category, or press TG, then click on any placed room, door, or other taggable category. The tag appears using whatever tag type is currently set as default for that category.
Does S15studio Teach Room Tagging Workflows?
Yes. The Revit Course Only program covers room placement, tagging, and documentation standards as part of its project-based curriculum.
Recommended
Comments